Mobile Learn Features
The above guide, provided by Blackboard, describes the features available in Blackboard Mobile Learn.

The above guide, provided by Blackboard, describes the features available in Blackboard Mobile Learn.

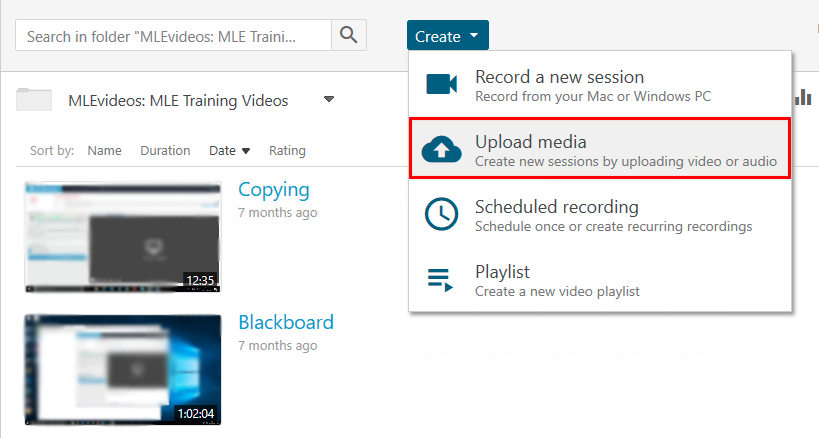
Either:

or
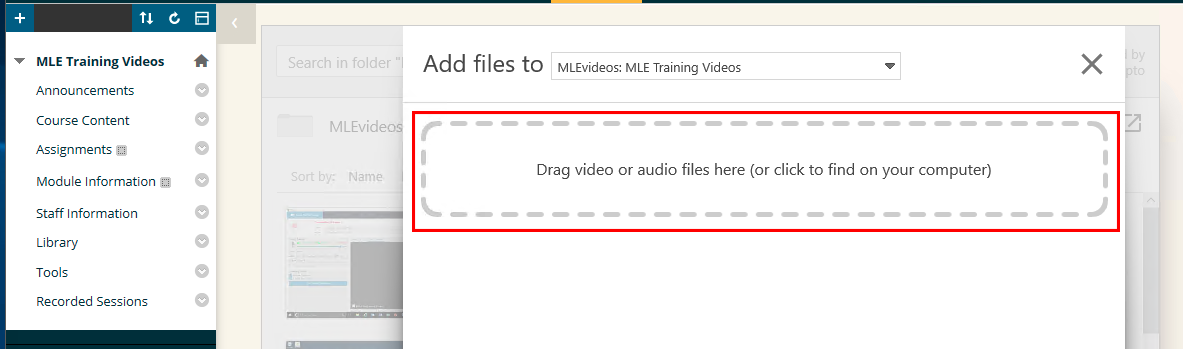
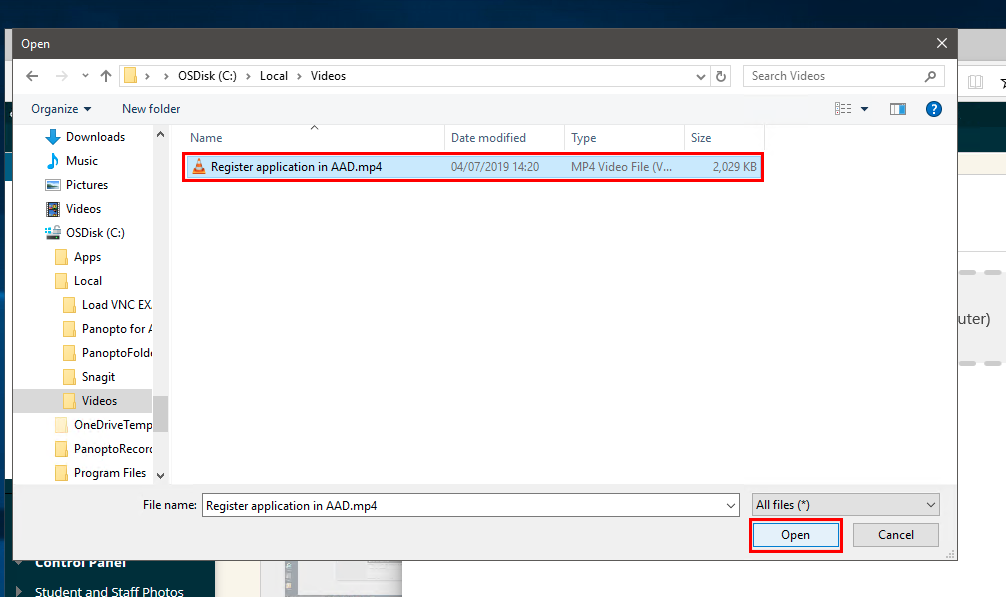
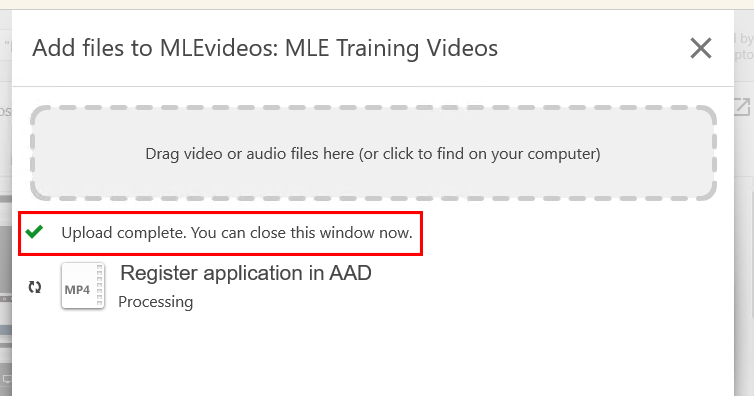
Your video will now upload. Depending on the length of the media file, it may take a few minutes to a few hours for the video to process. You may also edit the name of the media file while it is uploading.
Important note: You must not close the window until the page says “Upload complete. You can close this window now.”
Follow these instructions to enter the Panopto area of your Blackboard course
Please note: These instructions presume that you have enabled Panopto within your Blackboard course
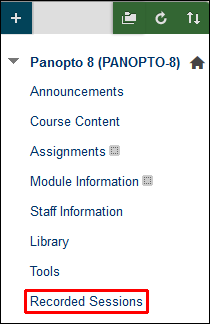
If you don’t see the Recorded Sessions link it is likely that your Blackboard course is not provisioned for use with Panopto. You can provision your course with these instructions – http://elearn.southampton.ac.uk/panopto/integration/provision/.
It is also possible that you previously provisioned your Blackboard course for use with Panopto, but chose not to add the Recorded Sessions link to the menu. In this case you’ll find Panopto in “Tools”, then look for “Panopto Content”.
Follow these four steps to activate your course for the semester.


![Most text is redacted. Course name, tutors, students on course. Last message is Successfully provisioned course [redacted]](https://generic.wordpress.soton.ac.uk/elearn/wp-content/blogs.dir/sites/64/2015/11/provisioningresults.png)
Your course is now provisioned.
If you see any other message, or your course appears to already be provisioned with the previous year’s course information, please contact ServiceLine.

To use Panopto you first need an area to record video into. You do this by linking a Blackboard course to Panopto in a process called provisioning.

We have four ways of showing Panopto content within Blackboard. Choose which one you like best from this page then follow the links to our guides.
Panopto content is secured to a particular Blackboard course by default and isn’t copied during a rollover. This page explains where to put Panopto content that is reusable across multiple years.

This guide is for Staff and Students to help identify and fix issues with no viewer rights to see Panopto content in Blackboard.
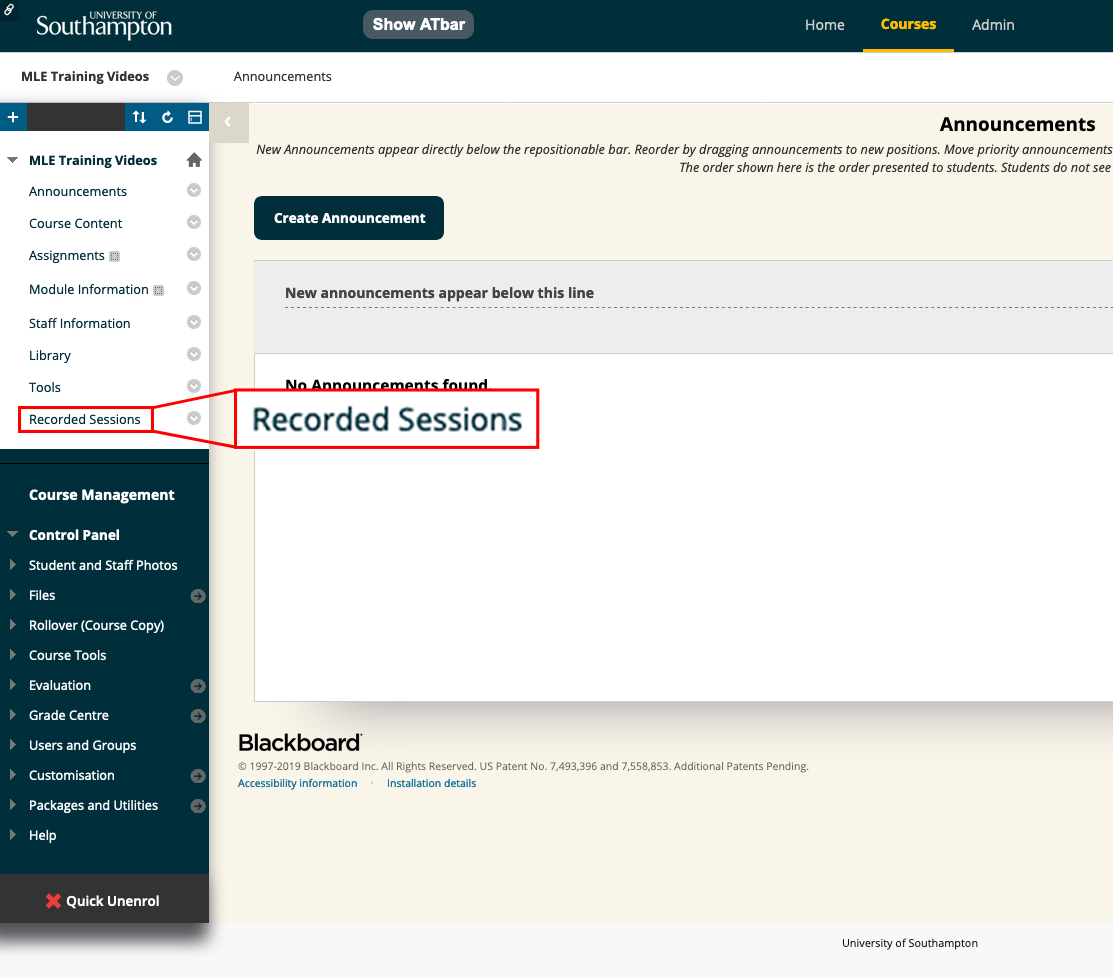
A number of our help pages tell you to go into the Panopto area of Blackboard. If you aren’t sure where that is, this guide will help.

If your course wasn’t provisioned or an AV technician helped you start your recording, your video may be in your My Folder. This guide will enable you to move it to the right place in Blackboard.

This guide shows you how to copy a video that is in a Panopto folder into another Panopto folder from the administration website.
Follow these instructions if you wish to to download recorded sessions to your computer so that you may watch them without requiring access to the Internet.
These instructions will help you view your Panopto recordings when only presented with a black page that asks you to sign in.
A wiki is a collection of web pages that allow users to add and edit content collectively. You may use wiki technology within your Blackboard course.

This guide covers using wikis from understanding the user interface to creating a wiki page.

This guide explains how to enable a wiki for course groups that you have already created.

Follow this guide to restore an earlier version of a wiki page.
This guide will show you how to add a Wikis entry to your course menu. It will also show you how to add a direct link in your course menu to a specific wiki.
1. To link to a new wiki page the page already has to have been created. If you have not already created the new page click on Create Wiki Page and set the page up as normal.
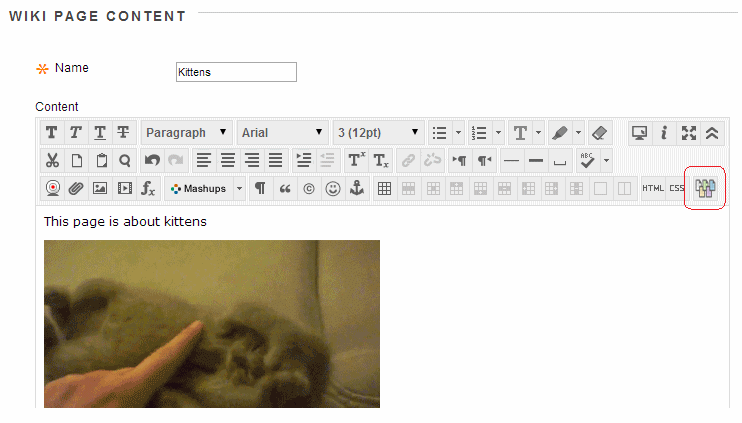
2. On the new page it is good practice to add a link to take the reader back to the previous page. So in this example we have created a new page about Kittens and we will add a link to go back to the main Cats page.
3. Click on the Link to Wiki Page button.
4. Set the Select Wiki Page Link dropdown menu to the page you wish to link to.
5. Type in the text that will form the link e.g. “back to home page”.
6. Click on Submit.
7. Your link will now be added. Click on Submit to finish editing the page.
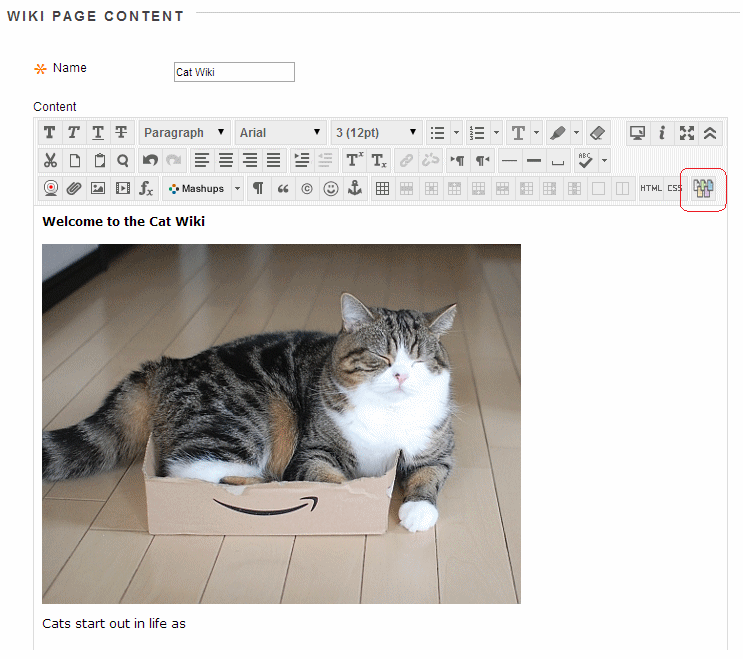
8. So now you can go through the same process to add the link to this new page you just created in your original page. So go back to the original page and edit it and add a new link to your new page. In this screenshot we want to add a link to the kittens page. The text is ready and we need to click on the create wiki link button which is encircled in red.

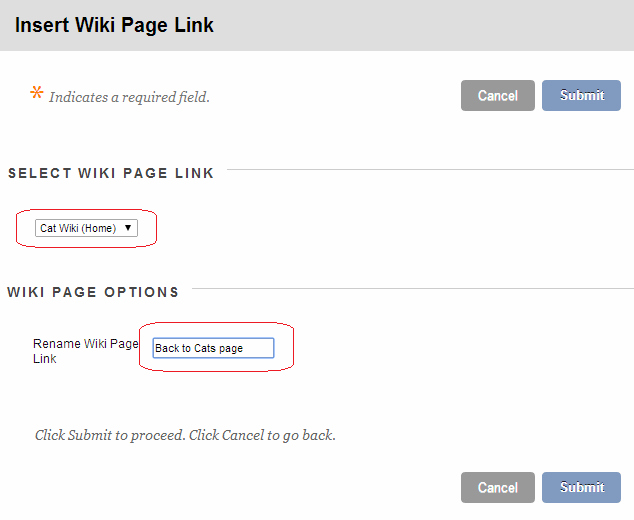
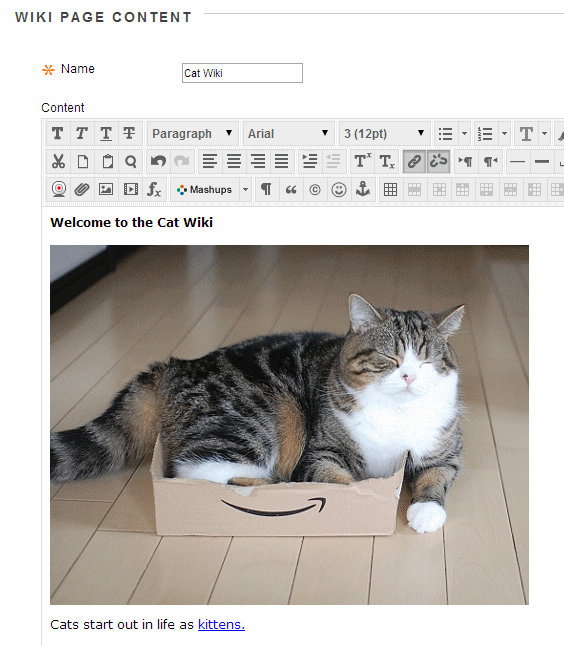
9. We select the kittens page from the dropdown menu.
10. In the Rename Wiki Page Link we finish the sentence we were typing so that “kittens.” becomes the link.
11. Click on submit.
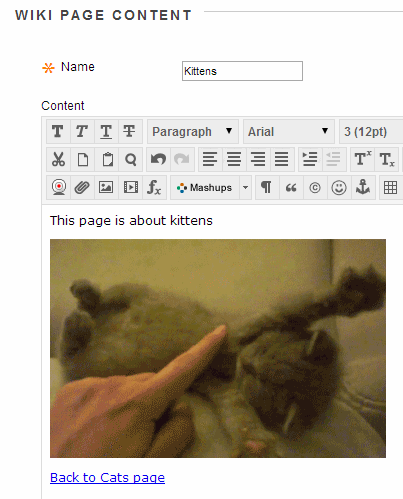
12. Now the link has been added. We can now carry on adding content if necessary and click on the Submit button to finish.
Follow this guide to restore an earlier version of a wiki page.
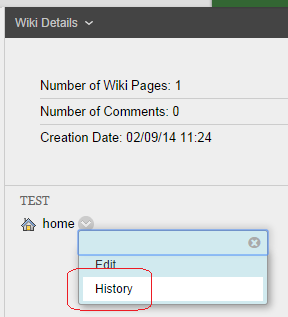
1. From the wiki page list identify the page you wish to roll back to an earlier version and click on the action button beside it.
2. Choose History from the menu that appears.

3. To roll back to an earlier version of a page delete the later versions up to the page to which you wish to “roll back”. Tick the page you wish to remove and choose Delete.
4. Note that this implementation of roll back means that you cannot roll forward after the event, because you have deleted the later versions.

1. If you are the first person to enter a wiki you will be asked to create the “homepage”. This is the first page that will be used in the wiki, and all other content will be linked to from here.
Therefore give the page a sensible name that will make this clear to the other users of the wiki.
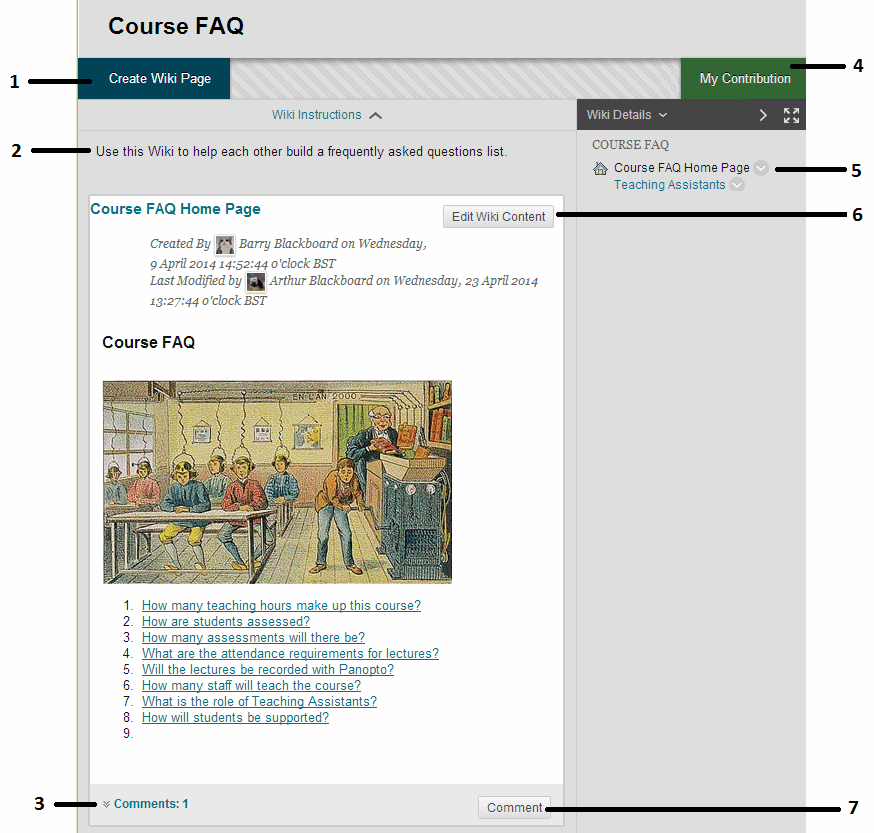
2. After the initial first page has been created a wiki will look something like this. Here follows an explanation of the icons and buttons.
1 – Create Wiki Page
Use this button to create a new page in the wiki. Once the page is created you can then edit an existing page to create a link to this new page.
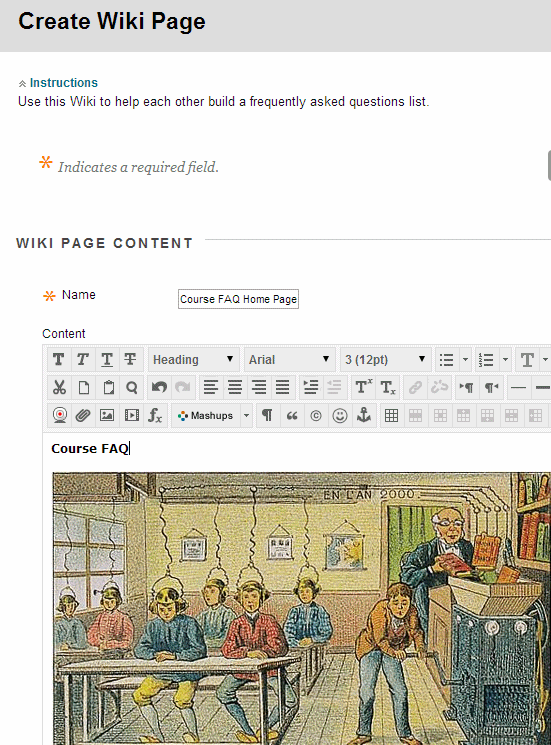
2 – Instructions
Any instructions entered by the course instructor will be shown here.
3 – Comments
This shows if any comments have been added to the page. Click on the downward pointing arrow to reveal comments.
4 – My Contribution
Clicking on this button will show some details about your usage of the wiki. This information may not be 100% accurate due to technical reasons.
5 – Page list
All pages of the wiki are shown here. A modify button is beside each one. Clicking on this button brings up a menu allowing you to edit the page or review the history of how it was made.
6 – Edit Wiki Content
Click on this button to edit the current page.
7 – Comment
Click on this button to add a comment.
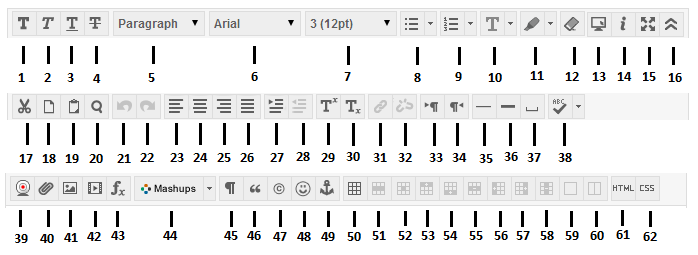
You can find an explanation of all the buttons in the text editor at this web page https://elearn.southampton.ac.uk/blackboard/WYSIWYG.
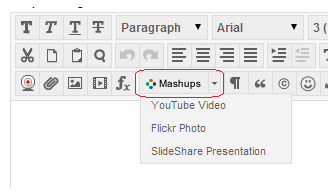
4. Some very useful features are hidden within the Add MashUp button:
1 – Embed a YouTube video
2 – Embed a Flickr Photo
3 – SlideShare Presentation – embed a presentation from the SlideShare web site.

5. Note that only one person can edit a wiki page at one time. If this is the case when you try to edit a page you will receive this warning.
You can easily and quickly add a link in your course menu to the Wikis area of your course.
This will display all the wikis in your course including group wikis. This will make it easier for your students to find wikis, particularly if you have a number of wikis in different parts of your course.
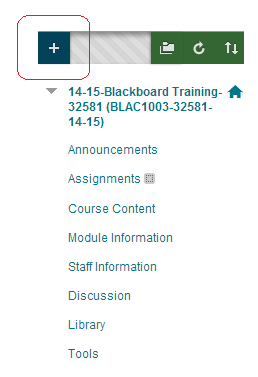
1. In your Blackboard course menu click on the [+] button.
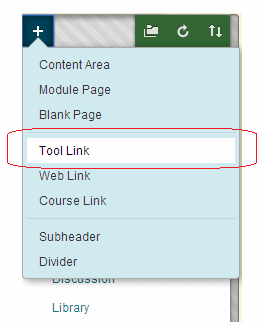
2. Choose Tool Link.
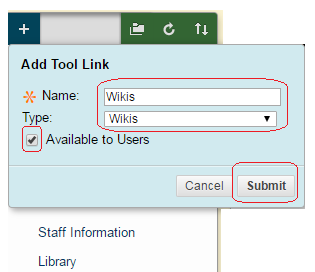
3. In the Name box enter text of your choice.
4. In the Type dropdown menu select Wikis.
5. Tick Available to Users.
6. Click on Submit.
7. If you wish you can move the menu item up and down the list by dragging with the up and down arrow to the left.
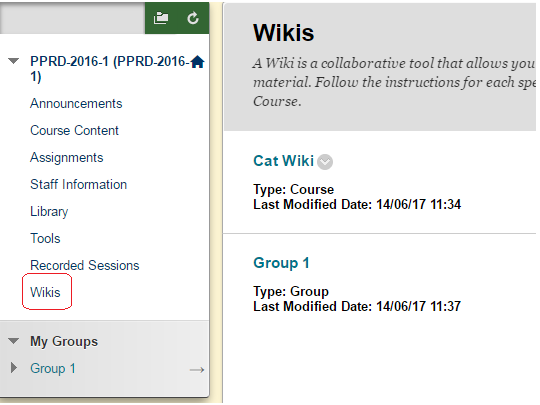
8. Clicking on the menu item will take users to the Wikis area.
9. If you have a course wide wiki (or indeed any other wiki) you may wish to add a direct link to it in your course menu. This is a little convoluted but possible. Use the following steps.
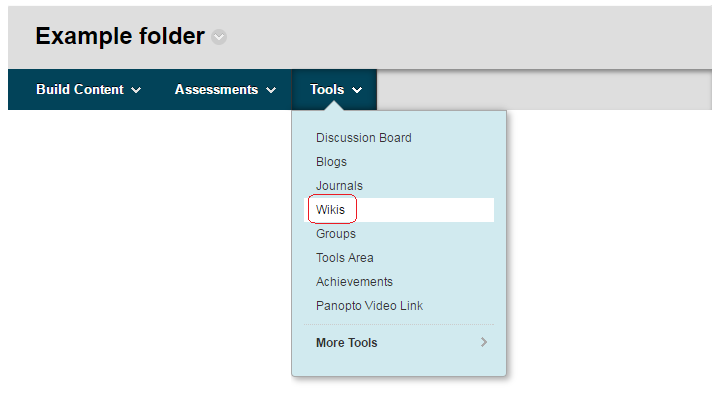
10. First we need to add a Course Link to the wiki in a content area. Identify the content area where you wish to add the link and hover over Tools and choose Wikis. If you already have a wiki link in your course you can skip this step.
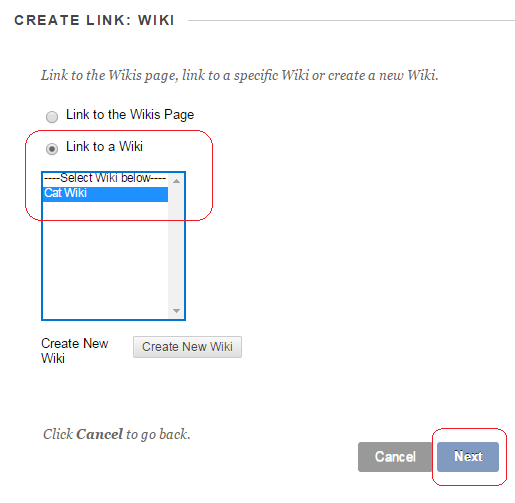
11. Choose Link to a Wiki.
12. Select the Wiki you wish to link to.
13. Click on Next.
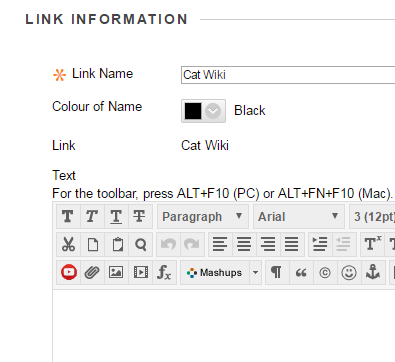
14. If you wish you may fill in the text box and set the options. Click on Submit when finished.
15. Now we will add a link to this link in the course menu.
16. In your Blackboard course menu click on the [+] button.
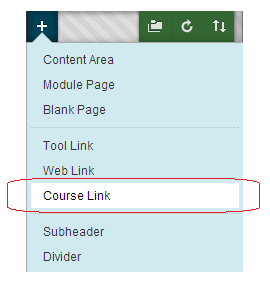
17. Choose Course Link.
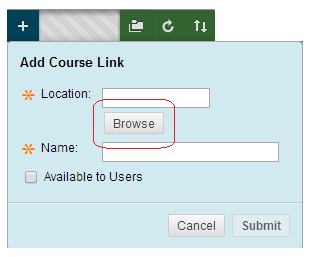
18. Click on Browse.
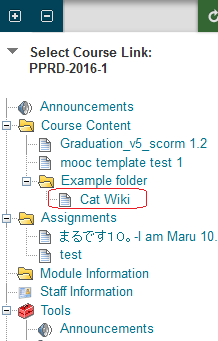
19. The Course Map will appear. Find the link you just made and select it.
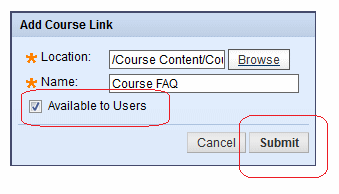
20. The Name and Location boxes will now be automatically populated. You may overwrite the name if you wish.
21. Tick Available to Users.
22. Click Submit.
23. You now have a link in the course menu that goes direct to the wiki you selected. Do not remove the link you created in the content area in the previous steps.
24. If you wish you can make the wiki the default entry point of the course. There is a separate guide on our website that covers this. In brief the line to follow is Control Panel -> (Teaching) Style -> Entry Point.