
| When using e-submission tools be aware of any Known Issues via our E-Submission – Known Issues and Practical Considerations page |
If delegated marking has been enabled for an assignment the instructor should reconcile the marks once marking has finished. Anyone with an instructor role may do this.
Reconciling means reviewing all marks and feedback made by other markers and demining the final score.
Reconcile screen
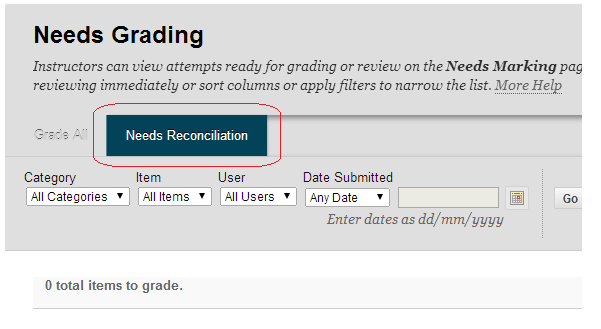
1. The reconcile screen is available from several locations. The first is from the Needs Grading page, accessible from the Grade Centre heading of the Control Panel.
or from the Grade Centre
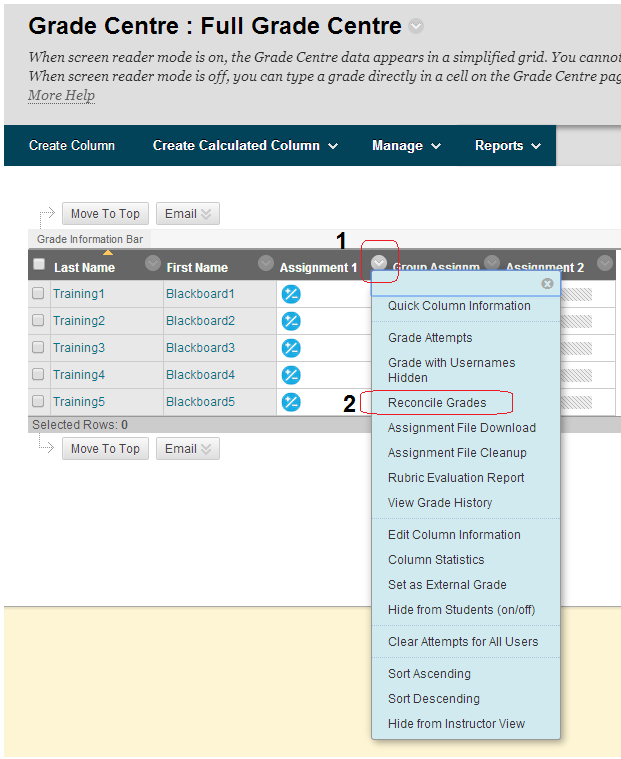
2. Another route to the reconcile screen is to enter the Full Grade Centre and from the assignment menu choose Reconcile Grades.
Reconcile Grades
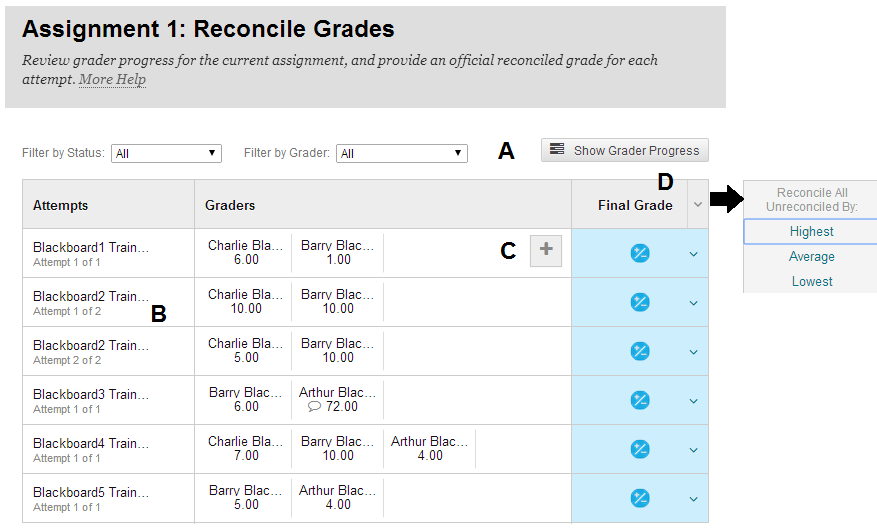
3. The reconcile Grades screen has several key parts described below.
A: Show Grader Progress: Click to view the progress of all markers, what the marker assigned for the average score for the assignment, and the number of student attempts they have marked.
B: Show Detail View: Click the icon to view existing grades, feedback, and view a rubric if one has been associated. From this view, you can hide all the graders’ feedback, add new feedback, and determine the final grade.
C: Add Grader: Click the plus symbol that appears when you hover your mouse over the student’s row to open a pop-up window to add one or more additional markers for this student.
D: Determine Final Grade: Use the drop-down lists to assign a final grade for each student. Or, use the Final Grade drop-down list in the column header to reconcile grades in bulk for highest, lowest, or average of the markers’ scores.
Grader Progress
4. Next we will look at each screen in turn, starting with Grader Progress.
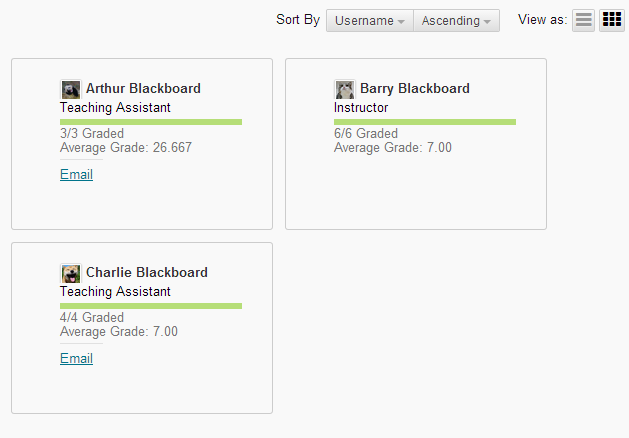
5.This screen shows whether all the markers have completed their marking, and if not how much marking they have left to do. This is shown by the Green bar and the X/X Graded line.
6. The average Grade given is also shown, allowing the identification of any marker who is marking unexpectedly higher or lower.
Student’s name
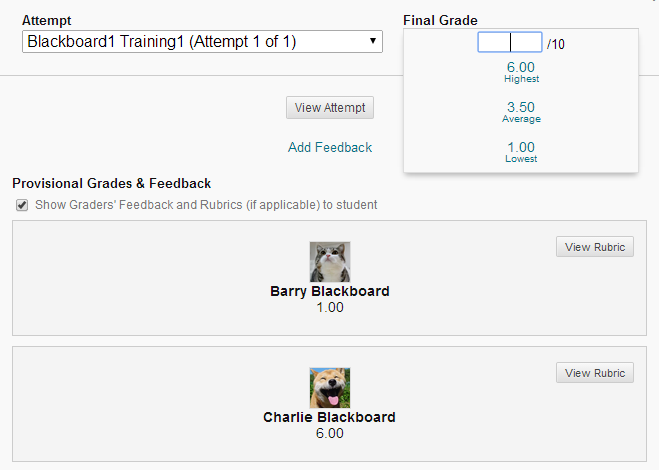
7. When you click on a student’s name you see a screenshot like the one above.
8. You see the marks and feedback given to the student by each marker. You may click on View Rubric if a Rubric was used to see how the Rubric was completed by each marker.
9. You may add Feedback to be given to the student by clicking on Add Feedback.
10. You may choose whether the feedback given by the other markers to the student should be shown to the student by ticking or not the Show Graders’ Feedback and Rubrics (if applicable) to student tick box.
11. If you wish to review the student’s submission, click on View Attempt.
12.To enter a final score for the student click on the reconcile grade icon within the Final Grade box. You can either enter a number manually or choose the highest, average, or lowest score.
13. Click on Submit when finished.
Reconcile Grades
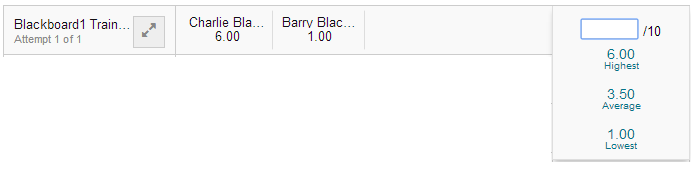
14. Looking back at the main Reconcile Grades screen in the Final Grade column you may click on the score to choose the final grade either by manually entering a score, or clicking on highest, average, or lowest. Note that unlike the preceeding screen it is not possible to enter feedback here and so this aspect should only be used for fine tuning the score.
Reconcile all the grades
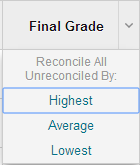
15. Finally when clicking on the downward pointing arrow at the top of the Final Grade column you may elect to reconcile all grades to the highest, average, or lowest score. This does not set feedback.