| When using e-submission tools be aware of any Known Issues via our E-Submission – Known Issues and Practical Considerations page |
A rubric allows for clear method for assigning marks to submitted pieces of work based on to what extent they fulfil certain criteria that you set.
This YouTube video gives a good introduction to using Rubrics.
Rubrics can be used with Blackboard Assignments, Essay, Short Answer and File Response test questions, blogs and journals, wikis, and discussion board forums and threads.
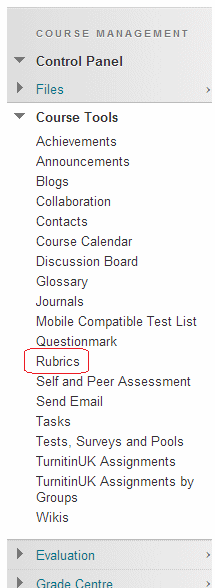
Control Panel

1. Expand the Course Tools area of your Control Panel and click on Rubrics.
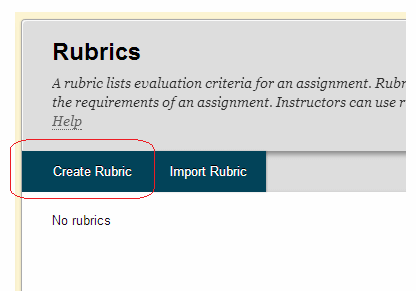
Create Rubric

2. Click on Create Rubric. Alternatively you can import a rubric that you have downloaded from elsewhere.
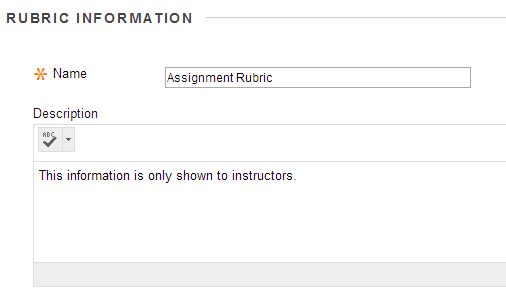
Name and description

3. Enter a name and description of your rubric. The description is only shown to instructors and can be used to help assign the right rubric to the right assignment.
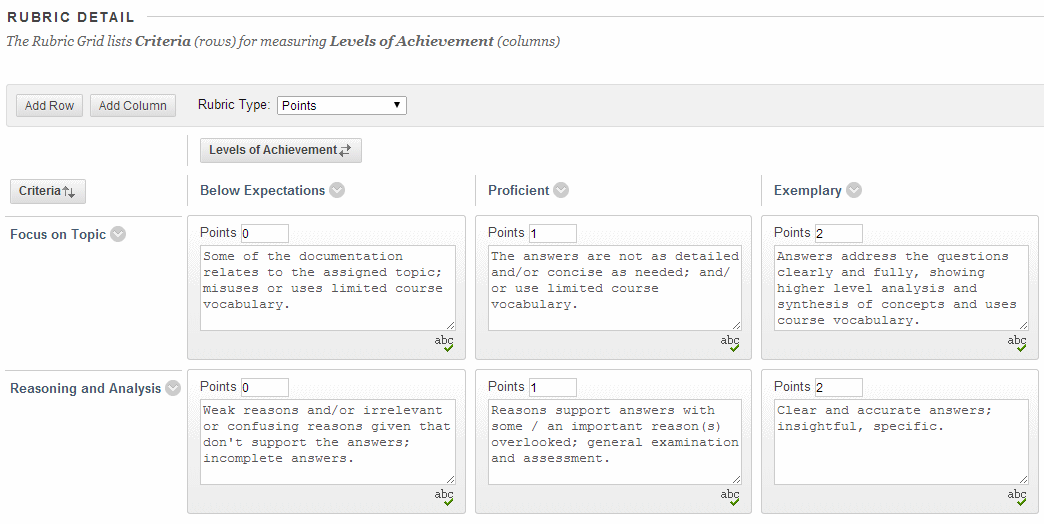
Creating a rubric

4. Next we can create our rubric. A default rubric is shown that you may either edit, or remove and start afresh.
5. The rows of the rubric grid represent criteria against which the submission will be judged. To add a new criteria click on Add row. To edit the name of a criterion, click on the action button beside the name and choose Edit.
6. The columns represent “levels of achievement”. In most cases these represent incremental improvements e.g. poor to average to good. Scores for each level should be entered. The format of the scores depends on what has been set in the Rubric Type box e.g. Points, or Percentage.
7. When you have completed the Rubric, click on Submit. The Rubric will now be available to associate with any of your Blackboard Assignments, Essay, Short Answer and File Response test questions, blogs and journals, wikis, and discussion board forums.
