A course wiki can be accessed by any course member. You can turn on or off the ability for students to edit the wiki.
Content Area
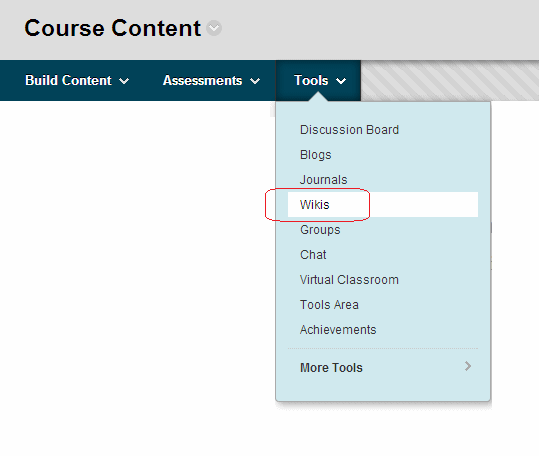
1. Find a content area where you wish to add a wiki. Hover over the Tools menu and choose Wikis.
Create New Wiki
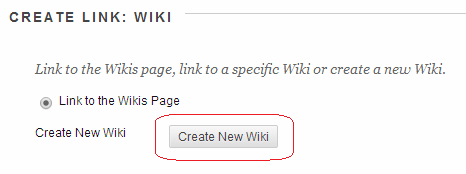
2. Click on Create New Wiki.
Name and Instructions
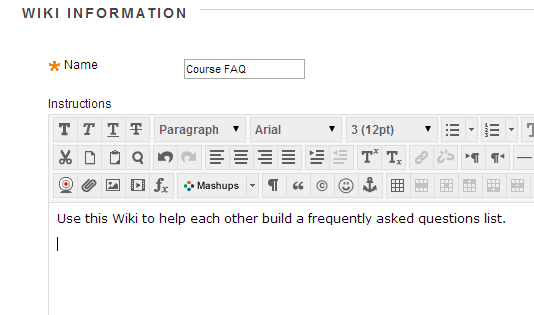
3. Enter a name and instructions for the wiki. Ensure that you tell your students what use you expect them to make of the wiki.
Availability
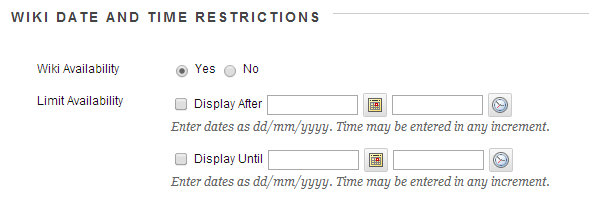
4. Check that Wiki Availability is set to Yes, otherwise students will not be able to access the wiki.
5. If you wish you may set date limitations on when the wiki is available.
Open for edits?

6. If you wish for students to be able to edit the wiki choose Open to Editing.
7. If you wish for students to be able to add comments to pages choose Open to Commenting.
Grade Centre?

8. If you would like a Grade Centre column to be added for the wiki enable the Grade option and set the total number of points possible.
9. Click on Submit.
Link to it
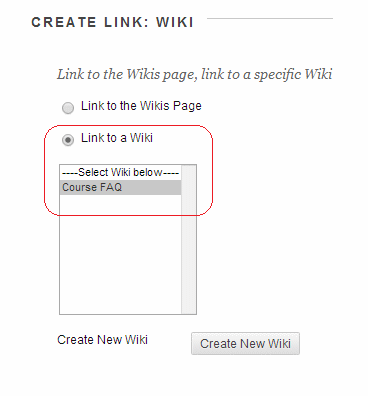
10. Check that your wiki is listed in the box and that Link to a Wiki is selected.
11. Click on Next.
Link details
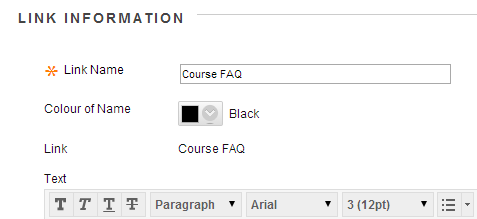
12. This next page is about how the link to the wiki will be created. Set a colour if you wish and click on Submit.
13. Your wiki is now created.
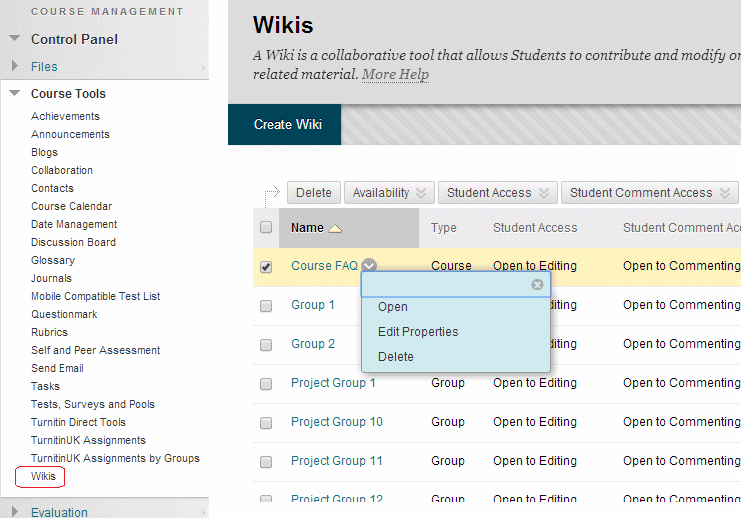
Wikis
14. If you should ever wish to modify the wiki options, or even just view all the wikis on your course, expand the Control Panel’s Course Tools area and click on Wikis. This will show a list of all wikis within your course including Group Wikis. To change Wiki options click on the Modify button beside the Wiki and choose Edit Properties.
