These instructions are specifically for users of the Mac Panopto Recorder.
Pre-requisites: Installing Panopto
Panopto is pre-installed in all our Windows based lecture theatre computers. Just search for Panopto in the Start Menu.
To install Panopto on your macOS computer, go to installing Panopto and select “Installing Panopto on Apple macOS” near the end of the article.
Step 1: Configuring the recorder
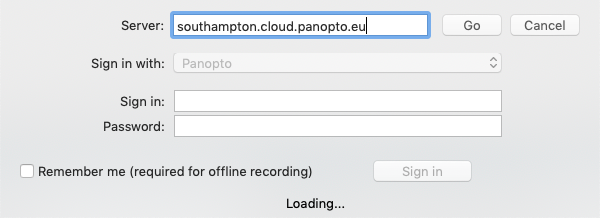
The new Panopto recorder version 6.0 or above will auto populate the server address. For older recorder versions the Panopto server address will not be automatically populated into the recorder.
Type: southampton.cloud.panopto.eu – into the server name field.
Step 2: Logging in
After typing in the server details click “Go” next to the server name.
All of Panopto’s user and security information comes from Blackboard. No staff member can log in using the “Login” and “Password” boxes.
By default the Panopto recorder should automatically show you option to log in with Blackboard.
If not:
Next to “Sign in with” you will have the new option of selecting a drop down list.
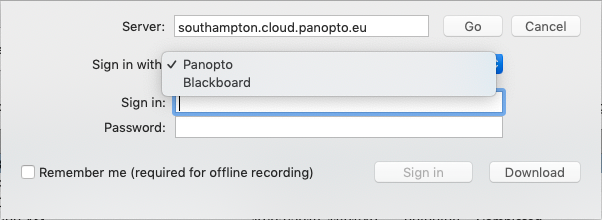
Change the sign in with option to be “Blackboard”. The Blackboard login website will appear.
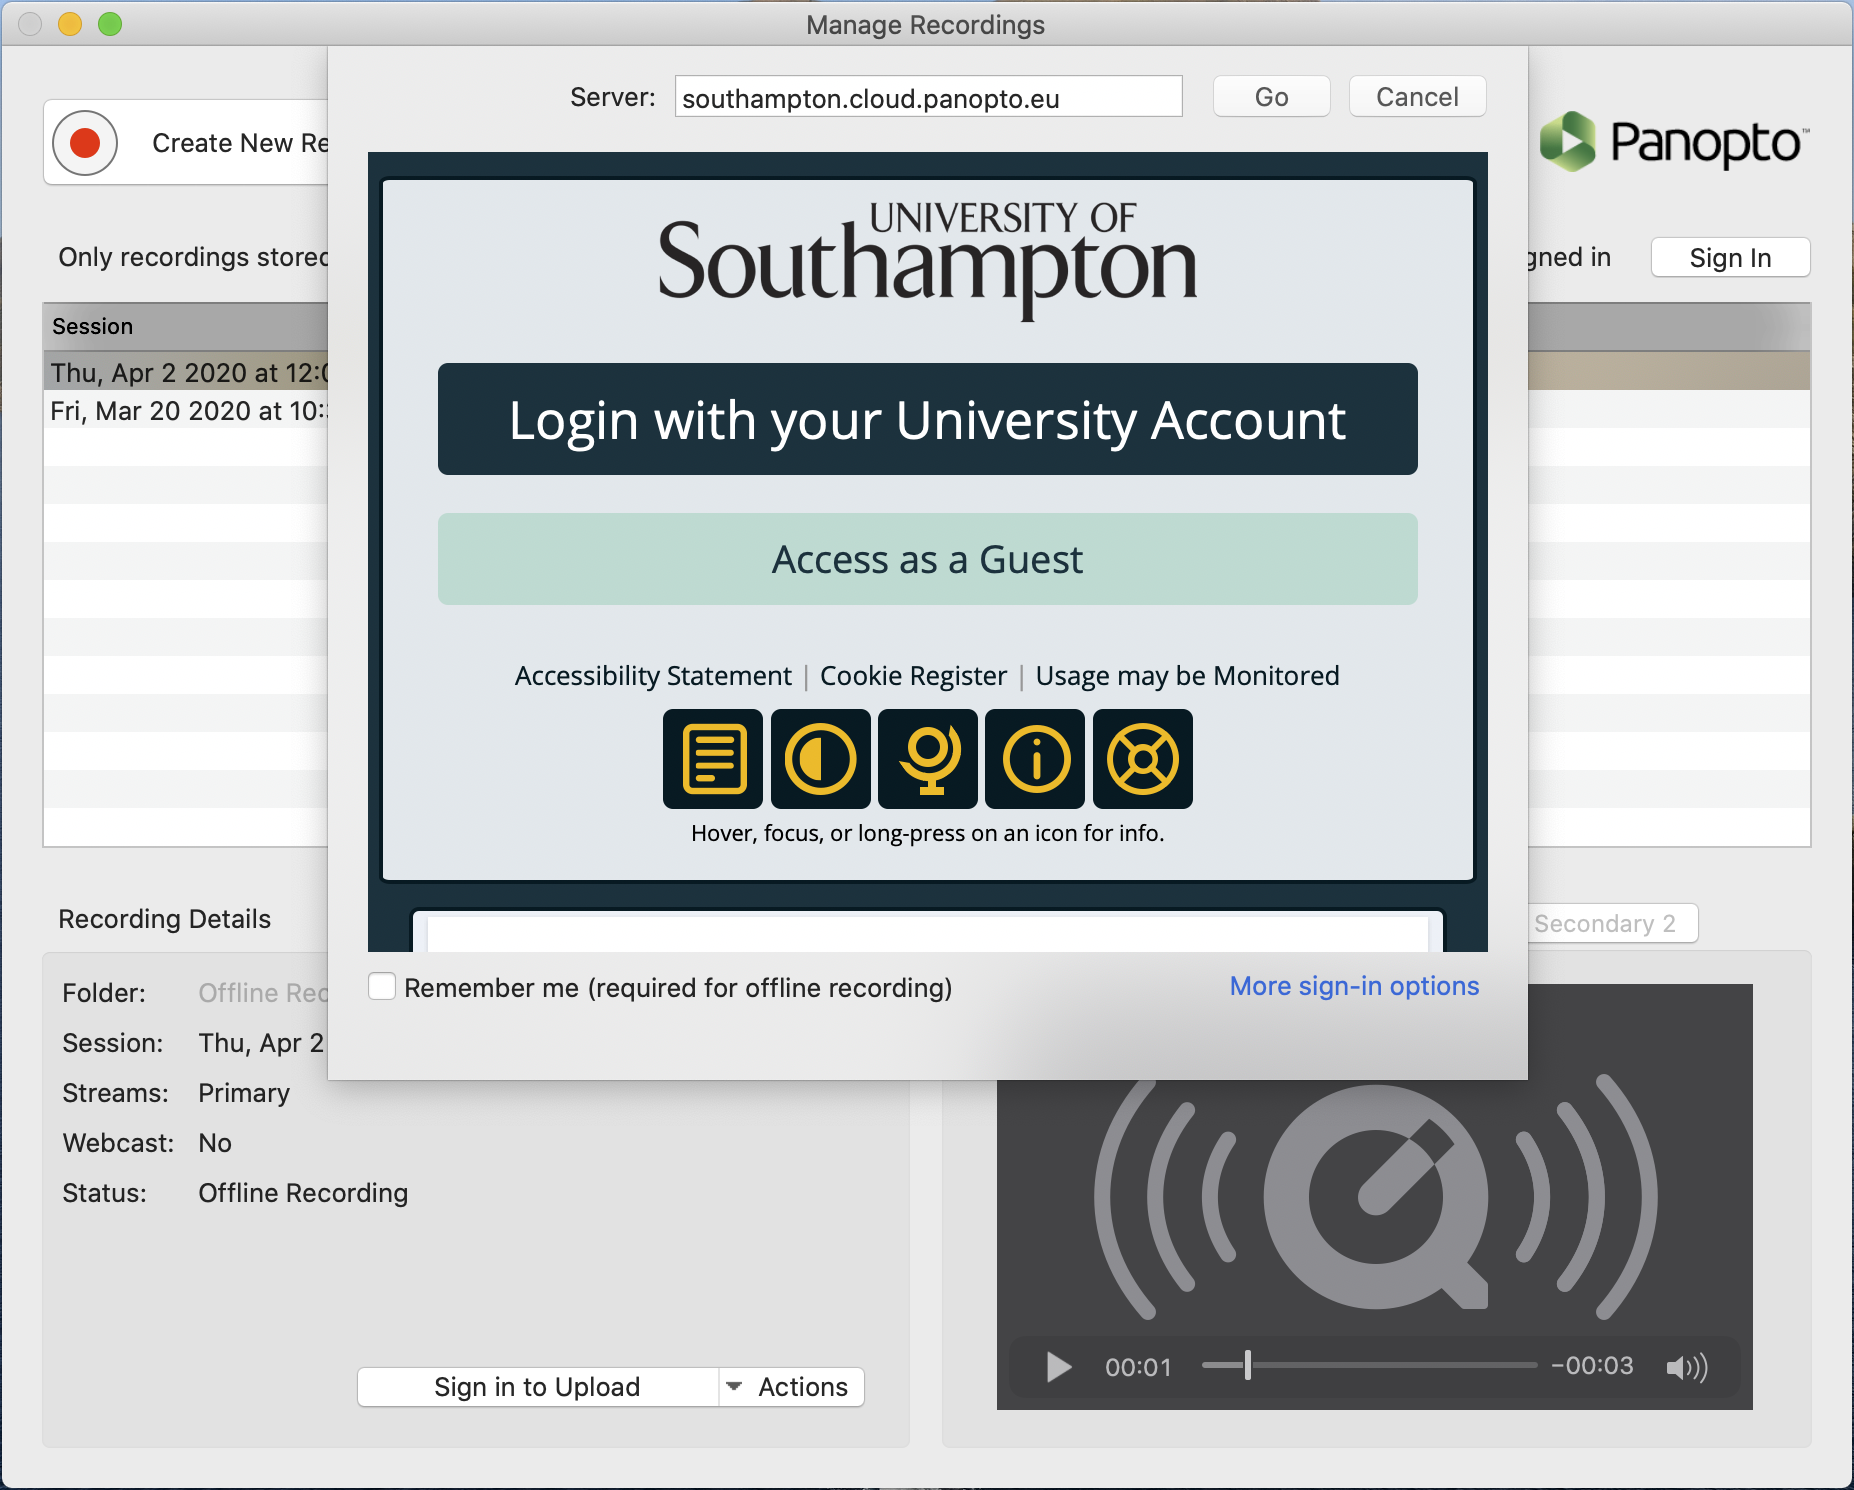
Use the login with your University account option to log into Blackboard as normal.
Step 3: Creating a recording
Press the large “Create new recording button”

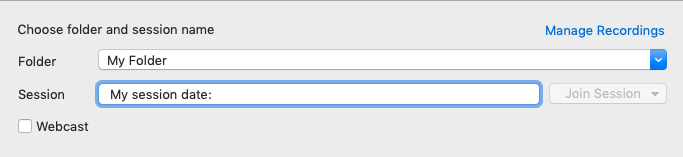
Choose the Blackboard course that you want to record into. Note: It can be quicker to start typing in the module code name to find the folder.
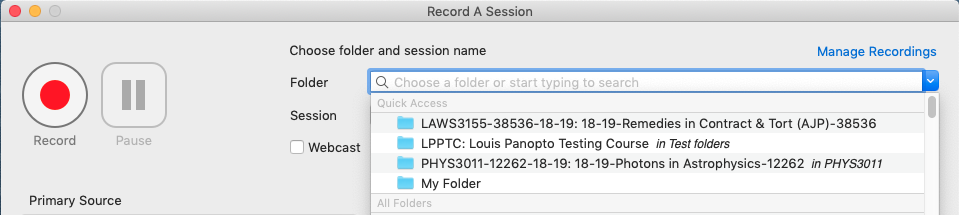
Give your session a name if you wish to do so.
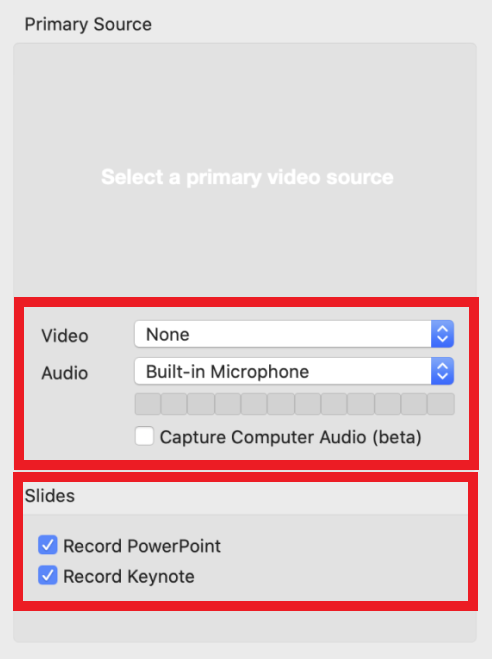
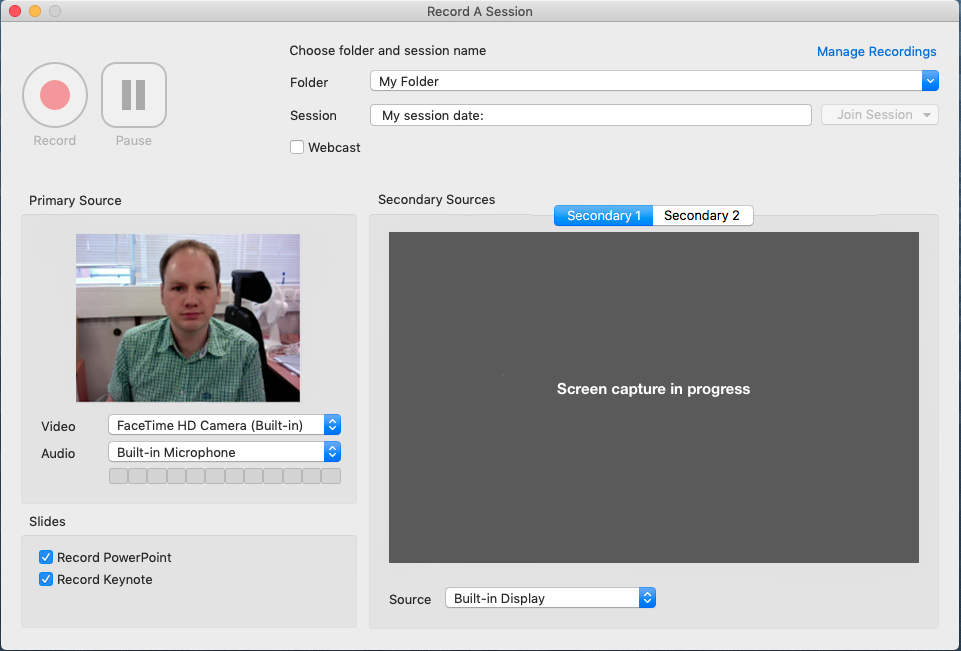
Under ‘Primary Source’ select the audio to be either the ‘Built-in Microphone’ or an external microphone if it is connected. At this point quickly check that you can see the audio meter show green bars that is working. You may or may not wish to have ‘Video’ enabled, but it is not essential to make a recording so it can be switched or left as ‘None’.
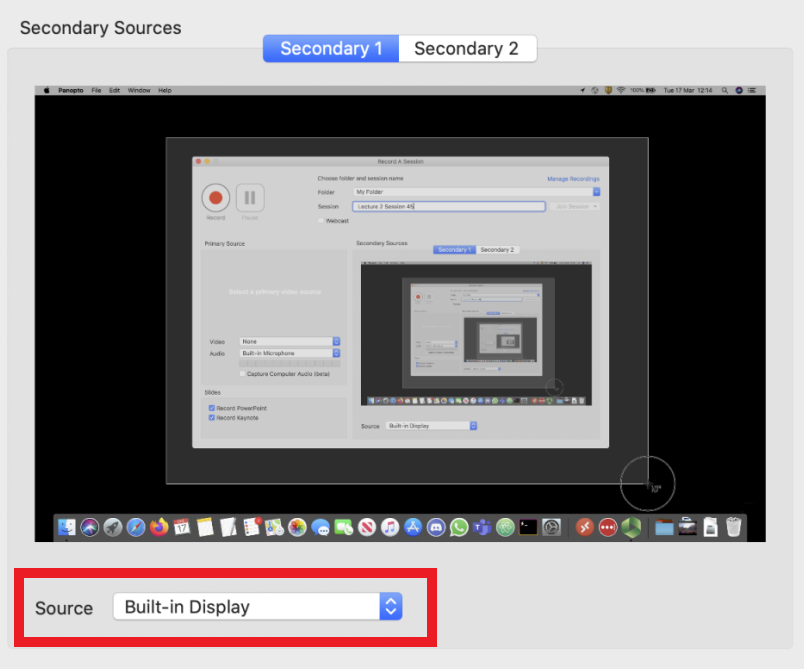
Screen capture is a bit different to the PC recorder as it is done as a secondary source. Under ‘Secondary Sources’ select ‘Secondary 1’ and on its source drop down menu select ‘Built-in Display’. This will be your main computer screen.
Once all checks have been made press “Record” when you are ready to begin.
Once you have completed your session press the “Stop” button.
Your recording will upload automatically after pressing stop. Keep the Panopto recorder open until the video has uploaded to the Panopto servers.
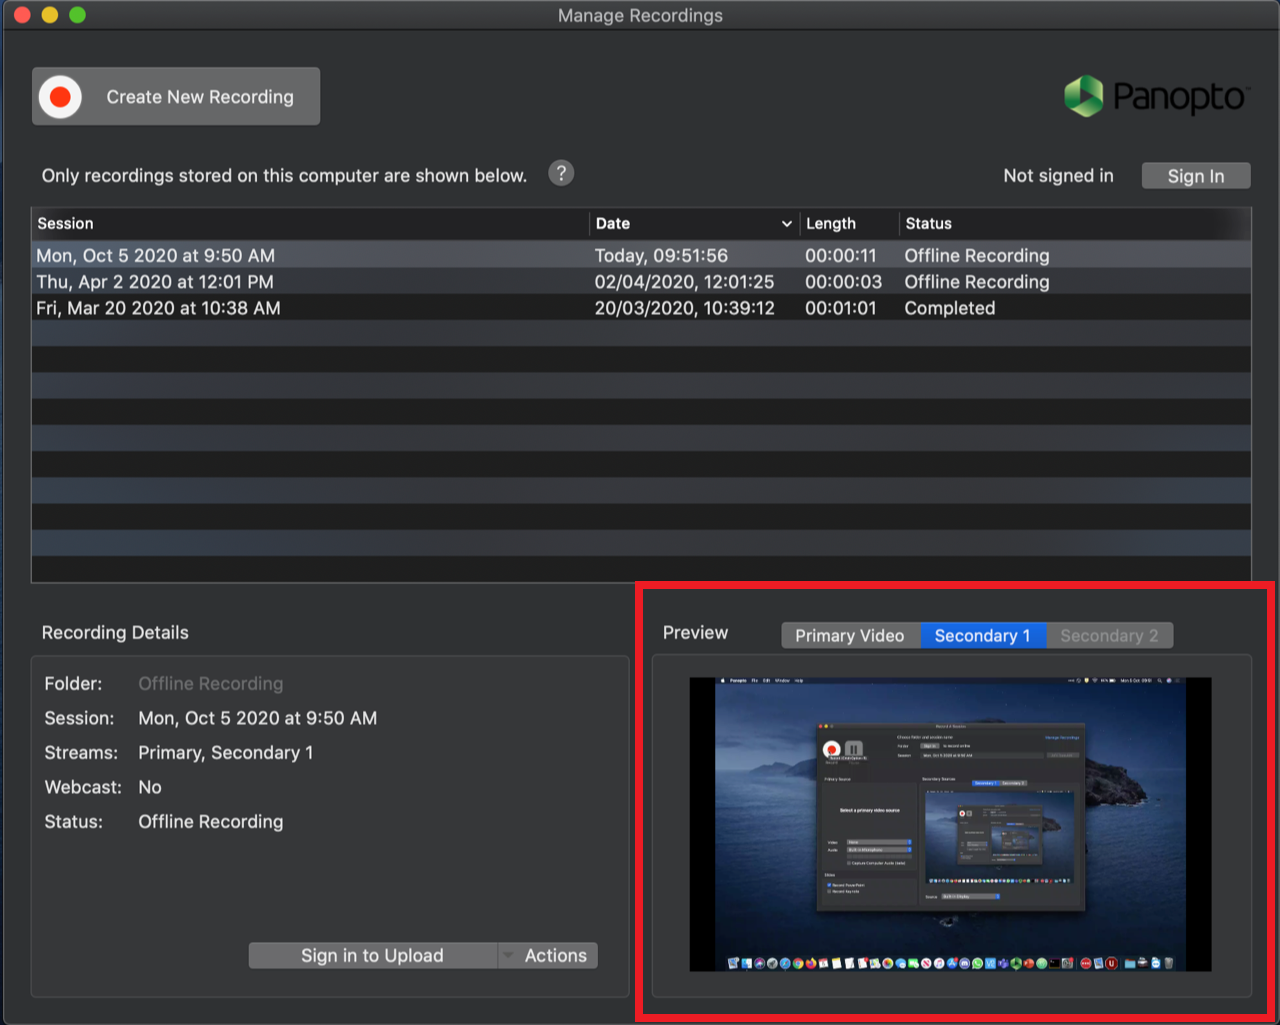
Important information about Preview
On the Mac recorder you will notice that when you have completed your recording that if you were to select it that in the bottom right you will get the option to ‘Preview’ the recording. Please note that this is not how it will look on the Panopto viewer for people watching back the recording. This preview only shows you the individual streams oh what you have just done. To see it fully you must upload it to Panopto.