Return to Blackboard Collaborate Main Page ↵
Check out the content being drafted below, this Blackboard web page and watch the video below.
The Collaborate UI
Session menu
The Session menu opens a collection of high-level session actions and information. Tools and features you use only once or twice during a session (such as recording) are located here. From this menu, you can turn recordings on/off, access the use of your telephone to use as audio, report an issue, access tutorials, access help, and read the privacy policy. Open it using the Session menu button.
Interaction bar
The Interaction Bar displays at the bottom of the Media Space. These tools allow attendees to engage actively in the session
Change view icon
The Change View Mode icon allows you to toggle between view modes. We’ll discuss these modes a little later in the session when we explore video in more detail.
Collaborate Panel
The Collaborate panel controls all of the collaboration tools you will use to engage participants during a session.
In the media space
The media space displays users and their profile pictures, as well as other tools during a content share: Stop, View Controls, and Swap. The media space will dynamically display the content being shared to attendees along with controls for displaying it.
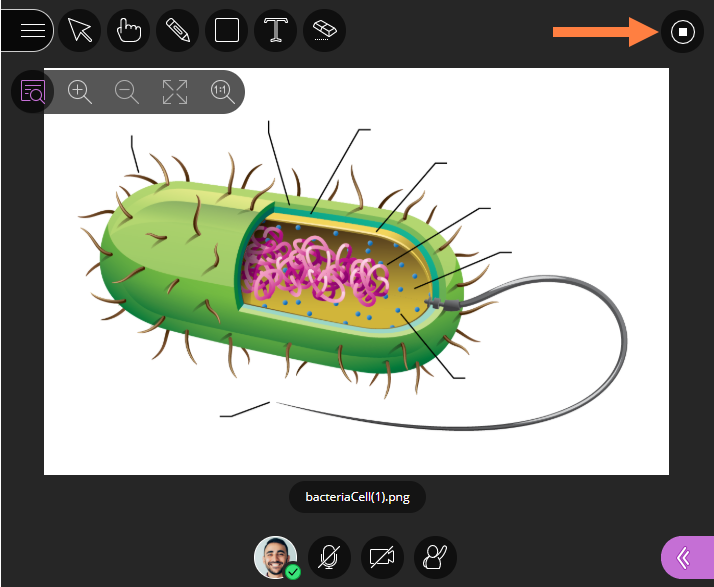
Stop
Once a Share Content has started, a Stop icon appears in the upper right-hand corner of the Media Space for all session attendees with a moderator or presenter role, allowing anyone with these roles to stop the share in progress.
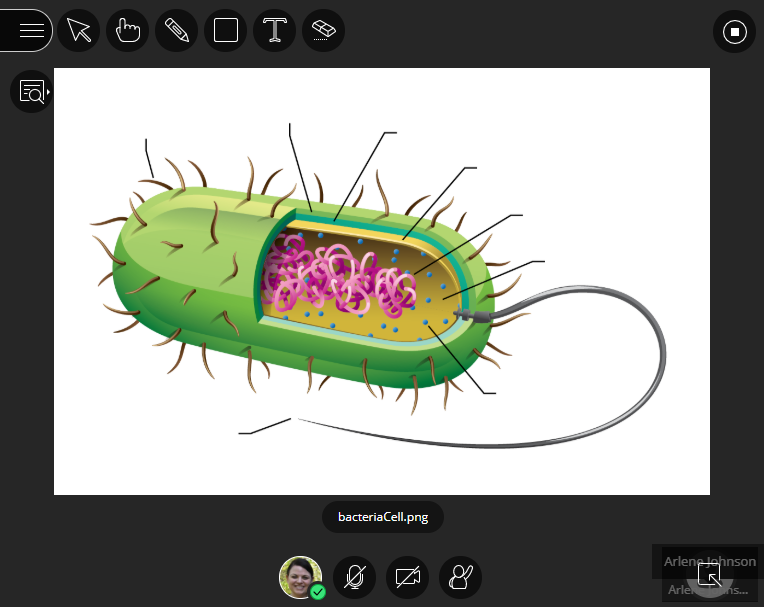
Swap
Users can swap the primary display from the content to the speaker by hovering over the smaller frame to display the Swap icon located on the bottom right of the session and selecting it.
View Controls
While content is being shared, resizing tools are available to all session attendees. These controls are user-specific. If a moderator chooses to resize their own view of the content share, this does not resize the content for other attendees.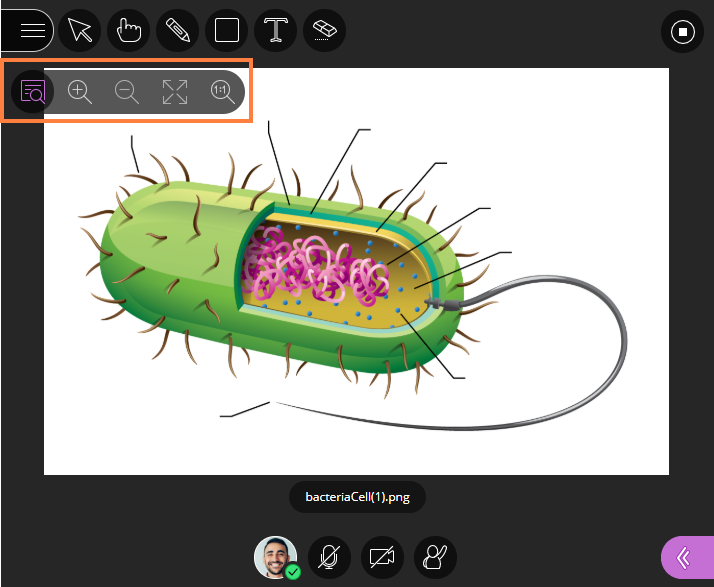
- Show/Hide controls allow you to expand and minimize your content resizing tools to reduce clutter on your screen.
- Zoom In allows users to make the content bigger. When the content displayed is larger than the available space, users can click and drag to move the content around in order to see everything.
- Zoom Out can be used to make the content smaller, allowing users to see more of the content.
- Best Fit takes advantage of your screen real estate by adjusting content so that it is completely viewable in the available area. It maximizes the size of displayed content while keeping the aspect ratio intact.
- Actual Size returns the content share to the original size.
Interaction Bar
The Interaction bar is located at the bottom of the Media Space and provides a variety of features that session attendees can use to interact within the web conferencing session. Each icon in the Interaction Bar will change color when activated.
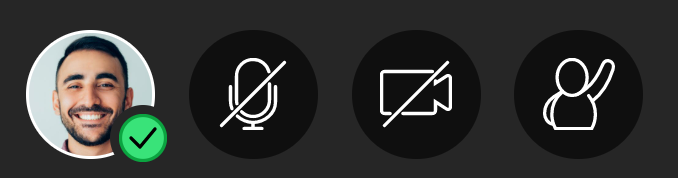
The Interaction bar includes My Status and Settings, Transmit Audio, Transmit Video, and Raise Hand icons:
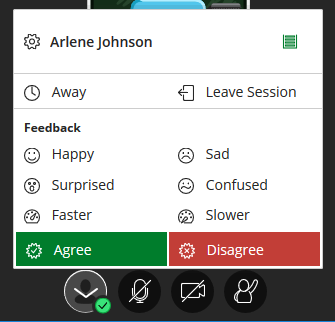
- Users can hover over their Profile Image to access the My Status and Settings panel, as well as to change their availability status when they need to step away from the session.
- The Step Away feature enables you to indicate to the others in the session that you are temporarily unavailable. You are still connected to the session; others just won’t expect you to be available for interaction.
- The Audio Indicator allows users to turn audio transmission on and off, as well as monitor their microphone levels. When broadcasting, the Audio Indicator will change colour and animate, to indicate live broadcast activity.
- The Video Indicator allows users to turn their video transmission on and off. When broadcasting, the Video Indicator will fill to indicate live broadcast activity.
- Participants can raise their hand at any time during the session by selecting the Raise Hand button. When active, the icon fills to remind users that they have engaged this tool. We’ll explore each of these tools in more detail later in the course.
- Select the Step Away icon in the Interaction bar, and the green check mark on your user profile changes to an Away mark to show that you have stepped away. Being away will mute your audio and video. Selecting the “I’m back!” button on the dialog box that displays will return your user profile back to “Present”.
Collaborate Panel
The Collaborate panel facilitates engagement with participants during the session. The Collaborate panel is where you will be able to chat with fellow participants, view a listing of all attendees, share content, share applications, annotate a blank whiteboard, initiate a poll, start/stop the timer, and divide the session attendees into small collaborative groups.
When accessing the Collaborate panel, the default tool will be Chat. The active panel will be underlined (as shown below). When you select another panel, it will become active. The active panel will remain until you change it again, even if you close the Collaborate panel.

Chat enables you to exchange text messages with others in the session and express yourself using emoticons.
Attendees provides a list of all participants, presenters, captioners, and moderators in the session.
Share content allows users with either the moderator or presenter role to share files, an application/screen, or the whiteboard. It also provides access to other collaboration tools like polling, timer and breakout groups. Attendees with the participant role will not be able to share content, but will be able to see the share content panel, which will display information about the content currently being shared.
My Settings provides the ability to configure your personal and session settings. You can manage participant permissions and adjust your audio settings and notification pop-ups, in addition to other functionality that we will discuss in detail in future modules.
Understanding Video
The video feature in Collaborate enables you to transmit video broadcasts to other users in a session. This is video you send live via a video camera (e.g., web cam), not to be confused with a pre-recorded video (movie). Just as with audio, the video permission must be enabled in order for participants to transmit their video.
In order to begin transmitting, users must select the Video Indicator icon in the Interaction Bar located at the bottom of the Media Space. Before live transmission begins, a preview window appears, allowing you to see what will display to other attendees. From the Preview, select Share Video to begin transmitting. The Video Indicator will change, to indicate live broadcast activity.
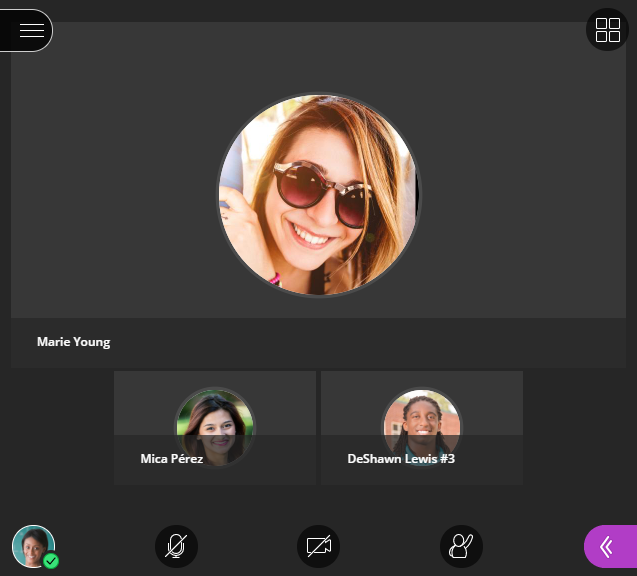
If no content is being shared, the Media Space displays the moderator and participant profiles or their video if they have activated it.
You can toggle between a grid view and one that follows the speaker. In Follow the Speaker mode, the person speaking appears in the centre of the screen and other attendees appear below as the discussion unfolds. Depending on the browser you’re using Collaborate supports up to the display of five simultaneous video transmissions. The displays are prioritised using the voice detection algorithm, to determine who is assigned to one of the active slots. If more users are transmitting video than the browser allows, Collaborate automatically defaults to Follow the Speaker view.
Grid View Mode


Follow the Speaker Mode