Follow this guide to add a YouTube video easily to your Blackboard course. YouTube is a third party web site and iSolutions cannot be held responsible for the content held on it. Users should read the YouTube terms and conditions.
Control Panel
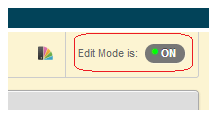
1. Check that Edit Mode is turned ON. This can be switched by clicking ON or OFF.
Choose a Content Area
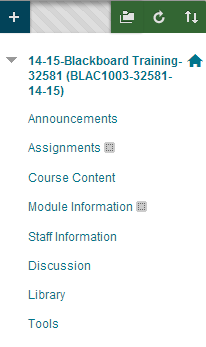
2. Choose the Content Area to which you wish to add your YouTube link. All the content areas work in the same way, if you have renamed or added content areas to your Blackboard course the screenshot above may vary from what you see.
Add YouTube Mashup
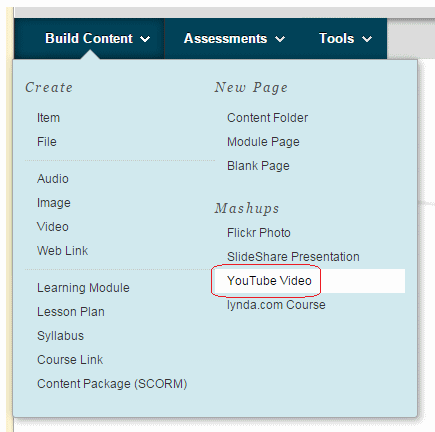
3. Hover your mouse over Build Content and then click on YouTube Video.
Enter Search Criteria

4. Enter your search term(s) and click on Go.
Search Results
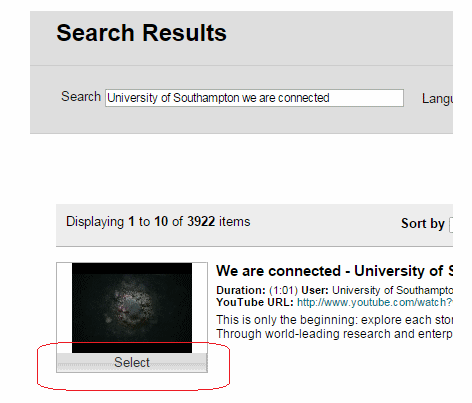
5. You should see a list of search results. Pick the video which you want to add to your course, and click on Select.
Add Video
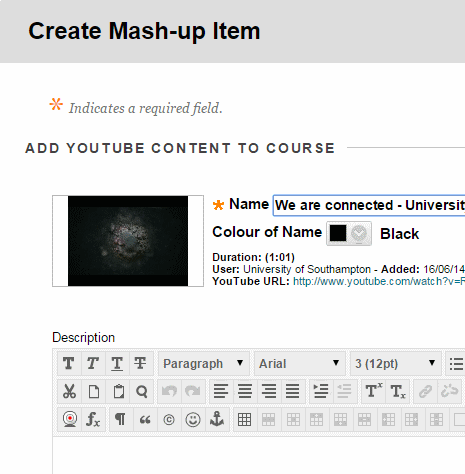
6. You may choose to change the display name for the video as it will appear in your course. You can also choose the colour of the name, and add a description of the video if you wish.
Further Options
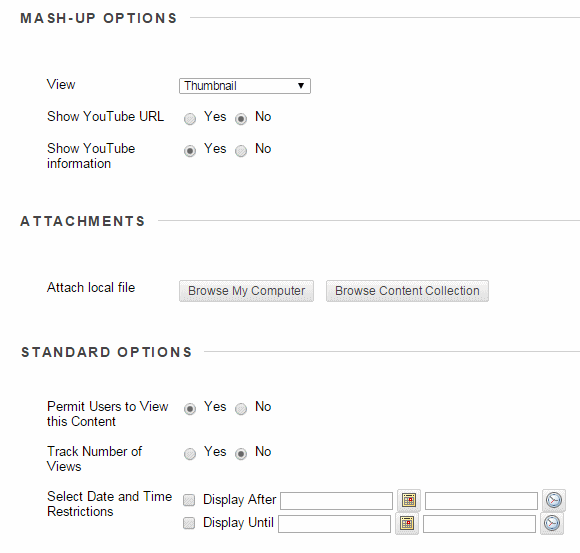
7. Choose your preferred view for the YouTube link when it appears in your course. There are three options, each of which is previewed in the following slides. If you wish to preview each view yourself, you can click on Preview at the top or bottom of the page.
8. Choose whether or not you wish to show the YouTube URL for the video, and if you want to show the YouTube Information for the video.
9. If you want to you can attach a file to this content as well (for instance if you have a word document which accompanies the YouTube video). You can add a file from your PC by clicking on Browse My Computer. This is optional.
10. Set the following options according to your preferences:
Permit Users to View this Content
Do you want students to be able to access this content? Selecting No would prevent your students from viewing it, but you would still be able to view it while Edit Mode is ON. The date restrictions option below is a more powerful way of doing a similar action. The default for this option is Yes.
Track number of views
Select Yes to indicate that the system is to track the number of times a user accesses this item.. Select No to indicate that the number of times this page is accessed will not be tracked. Only use this option when you particularly require tracking information. A general report on Course Statistics provides tracking information for the whole course and is available from the Control Panel. For more information about this feature check the link on the right under “What’s Related”.
Select Date and Time Restrictions
If you wish you may restrict when this content will appear. Tick the boxes and determine times and dates as appropriate. Ticking Display After will mean that the content will appear from the time and date that you select. Ticking Display Until will mean that the content will no longer appear (disappear) after the date and time selected has passed. This only affects the way the material appears to students. As a course instructor you can change this setting at any time and the content will always be available to you.
Thumbnail Preview
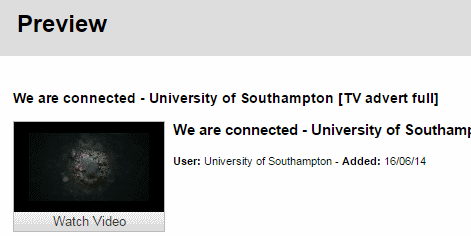
9. This screenshot shows a preview of the Thumbnail view for a YouTube Mashup.
Text Link with Player Preview
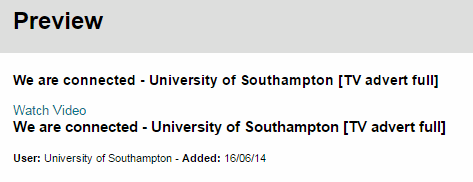
10. This screenshot shows a preview of the Text Link with Player view for a YouTube Mashup.
Embed Preview
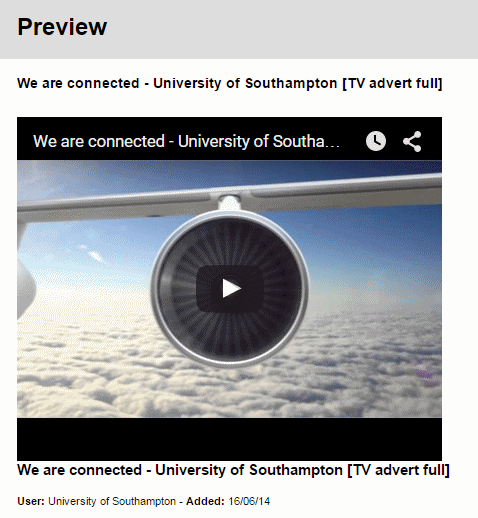
11. This screenshot shows a preview of the Embed view for a YouTube Mashup.
Submit

12. Click on Submit. You can preview how your YouTube mashup will look by clicking on Preview.
