Smart Views are views of the Grade Centre based on certain user selectable criteria. Once smart views have been set up they may be used at any time within your course’s Grade Centre.
To set up and use a Smart View follow these instructions.
Note: an error has been reported within the Blackboard community. If a Smart View is created that is based on membership of a group, or by selecting students, and a student within that criteria drops the course, meaning that they are disabled from the course by the snapshot, then the Smart View will fail. If this Smart View has been made a default view of the Grade Centre then you will not be able to get into the Grade Centre. Therefore do not make a Smart View you create the default view for the Grade Centre.
Grade Centre
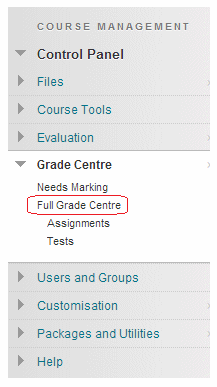
1. From your course Control Panel open the Grade Centre.
Manage
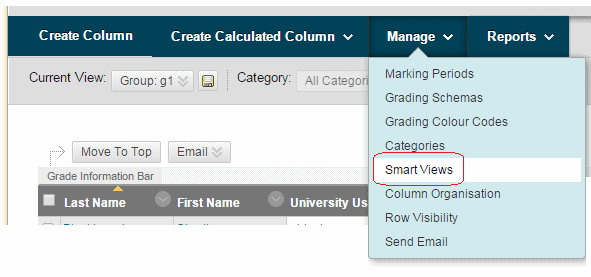
2. Hover your mouse pointer over Manage, a menu will appear, choose Smart Views.
Smart Views
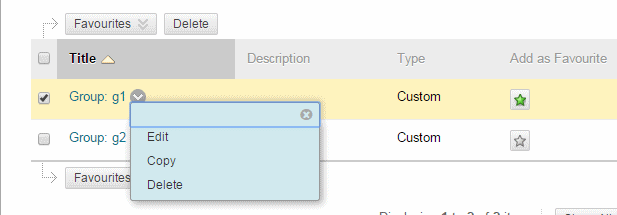
3. You will be presented with a list of any existing Smart Views, which you may edit, copy, delete, or make a favourite.
Note that “favourite” smart views will appear as short cuts within the Grade Centre menu within the Control Panel.
4. To create a new Smart View click on Create Smart View.
Name and Description
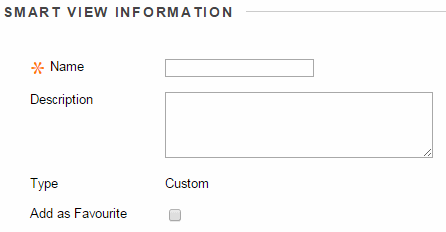
5. Enter a name and description for your Smart View.
6. If you wish you may set it to be a favourite smart view. Favourites will appear within the Control Panel so they are easy to get to.
Type of Smart View

7. Choose the type of Smart View you wish to set up:
Group
A group smart view will show selected groups that have been set up in your course.
Benchmark
A benchmark view will show a view based on performance in a single gradable item.
Focus
A focus view will show selected users only.
Investigate
An Investigate smart view will show data based on a complex query of student and grade centre column attributes.
8. Select the criteria to be used by the view. This will vary depending on the type of view you have chosen to create.
Data

9. Choose which data should be shown in the view by selecting Filter Results from the dropdown menu.
10. Click on Submit to finish.
Using Smart Views
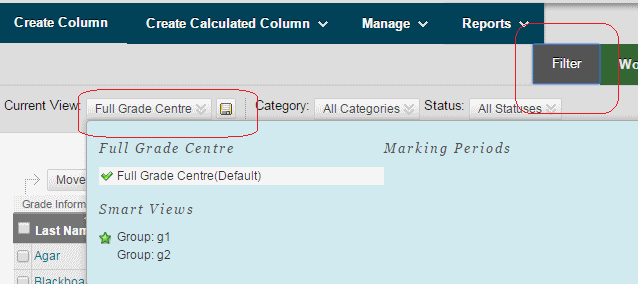
11. To view a Smart View from the Grade Centre, click on the Filter button, hover the mouse over Current View, and choose the Smart View you wish. Do not set a custom smart view to be the default view – if a student within that view drops from the course the view will become inaccessible and you will be locked out of the Grade Centre. Instead make the Smart View a favourite.
