
You may create Blackboard groups using Comma Separated Files.
Create CSV
1. First create your CSV file using a program such as Excel or Notepad.
2. The headings required are: Group Code,Title,Description,Group Set,Available,Personalization,Self Enroll,Max Enrollment,Show Members,Sign Up From Group List,Sign Up Name,Sign Up Instructions. However these headings should be removed when you save your CSV file.
Group Code
The internal system name to be used for the group. This must not contain spaces or special characters.
This field is required.
Title
The name of the group.
This field is required.
Description
Some text describing the group.
Group Set
If the group is part of a group set.
Available
Should the group be visible to students?
Use Y or N.
This field is required.
Personalisation
Should students be allowed to personalise their group area?
Use Y or N.
Self Enrol
Whether students should be able to enrol themselves into the group.
Max Enrolment
The maximum number of group members.
Show Members
Whether students should be able to see who else is in the group?
Use Y or N.
Sign Up From Group List
Whether a sign up sheet should be created for the group.
Use Y or N.
Sign Up Name
The name of the sign up sheet e.g. “Sign up here”.
Sign Up Instructions
Instructions shown to students who attempt to sign up to be a member of a group.
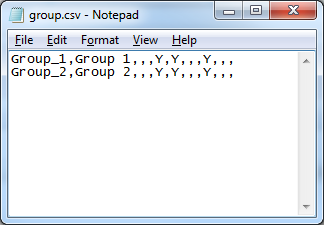
3. Save your file as a .csv file. An example of how it might look is shown in the screenshot above.
Users and Groups
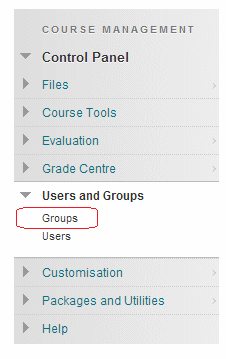
4. From your course Control Panel expand the Users and Groups section and click on Groups.
Import
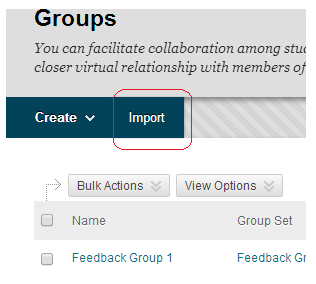
5. Click on Import.
Upload CSV
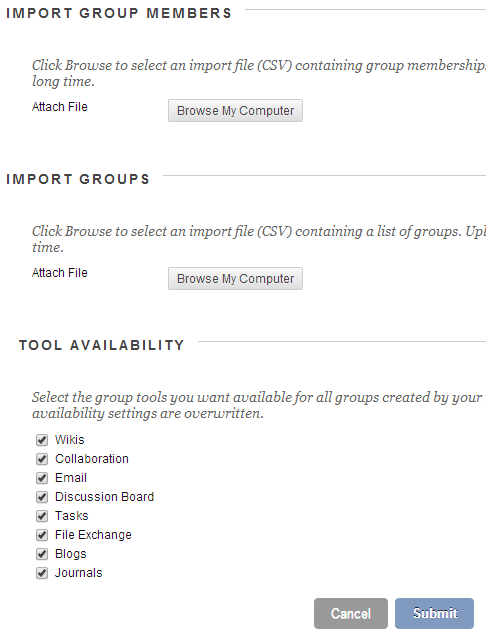
6. Under the heading Import Groups click on Browse My Computer then navigate to and select your CSV file.
7. Tick the tools you wish to be made available for all groups within your CSV file.
8. Click on Submit. You will receive an email when your groups have been imported.