
The Glossary feature allows you to build a collection of definitions of commonly used terms for your course. This can be useful as a reference when students are reviewing new or complex material because the definitions are defined by the instructor and can be recalled at any time directly from the course.
To use the Glossary it is necessary first to add some terms and then to make it available to your students.
Access the Control Panel
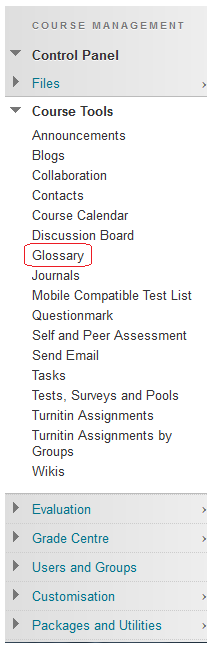
1. From your course Control Panel expand the Course Tools area and click on Glossary.
Edit Mode
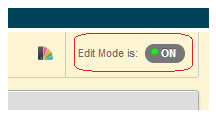
2. Check that Edit Mode is turned on.
The Glossary Manager
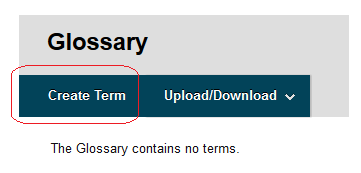
3. The Glossary Manager will be displayed. You are presented with three options: Create Term, Upload Glossary, Download Glossary. Full explanation of how to use these final two options can be found on the subsequent screens displayed having clicked on the relevant icon.
4.Click on Create Term.
Add the Term and Definition
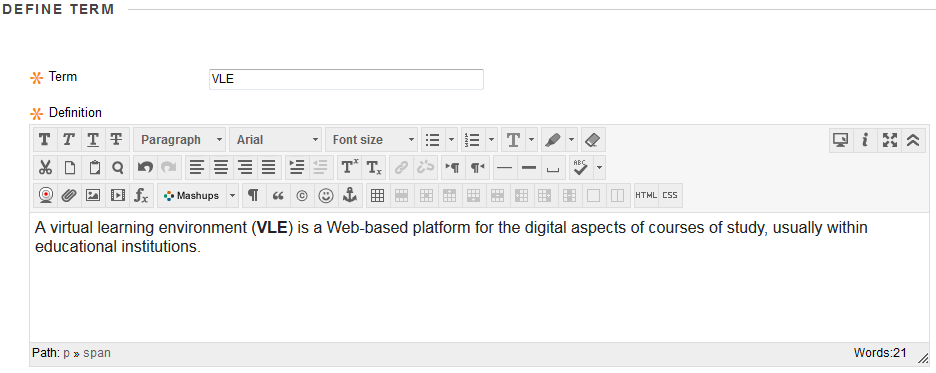
5. Enter details about the term and its definition. Note the warning that if you enter a duplicate term it will replace the existing term.
6. Click on Submit to submit your glossary entry.
Success
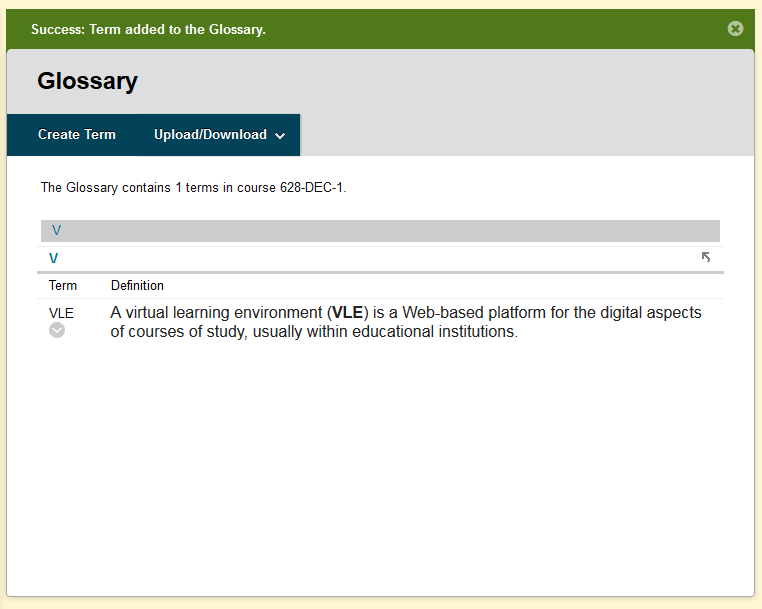
7. A receipt screen will appear confirming the details that you have entered. You may click on Add Another Term in order to add another term, or click on OK to finish. Note that you can add further terms at any time by following these instructions from the beginning.
Modify?
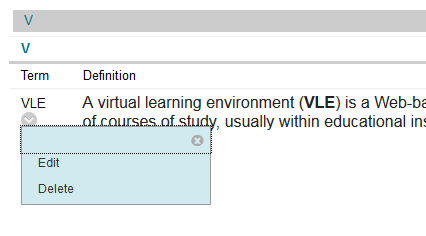
8. Note that you may Edit or Delete terms that you have added by clicking on the Modify button beside them.
How to make the Glossary available to your students.
The Glossary is available by default from the Tools menu when a student uses your course. You can also add a button to your course menu which will take the student directly to the Glossary when they click on it.
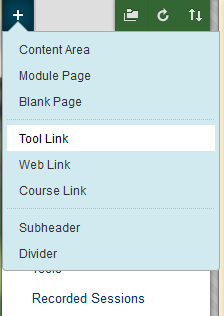
To add a Glossary menu item follow these instructions:
1. Click on the Plus icon above the course menu and choose Tool Link.
Add Tool Area
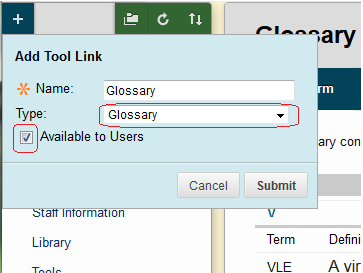
2. Enter Glossary into the Name box
3. Select Glossary from the Type dropdown menu.
4. Tick Available to Users
5. Click on Submit to finish.