Protecting your content, whilst maintaining flexibility for students
Most teaching staff at the University now use Blackboard to share content with their students. A number of staff are now considering making their content “read only” so that it is not possible to alter the content after it has been downloaded from Blackboard.
There are a variety of ways of achieving this, but at the same time it is necessary to consider how our diverse population of students will be using this content.
Creating Adobe Portable Document Format (PDF) files from Microsoft PowerPoint
Some users have been creating read only PDF files from PowerPoint files. This is a useful way of protecting content. However it is important to consider how students will use the format.
One example that has been reported to us was of a student whose instructor had created PDFs of PowerPoint files showing the slides in “handout” mode with six slides to a page. When these PDFs were printed the text was too small to read and due to the read only nature of the PDF it was not possible for the student to print the slides in a larger format.
One way to allow more flexibility with printing whilst maintaining control over content is to produce two PDF files:
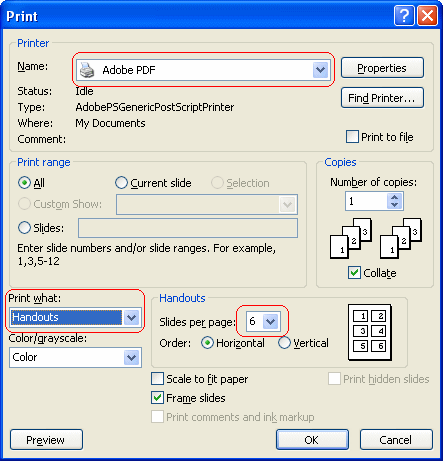
One file using the six to a page handout presentation.
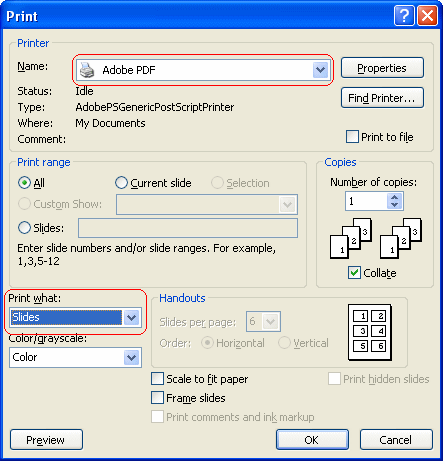
The other file with one slide to a whole page.
Through producing two files the students have a choice. Most will prefer to print the six slides to a page version, whilst those who prefer larger text are able to print out the full page version.
Password Protecting PowerPoint files
It is possible to set PowerPoint files to be editable only through the use of a password. This in effect makes the files “read only” until a password is supplied.
It is important to note that it is not possible to recover a forgotten password. Password protecting a file and forgetting the password will mean not being able to edit the file again.
In order to prevent this from happening make a copy of your original PowerPoint file and make the copy read only. Place the read only copy onto Blackboard and keep the original file safely in your home filestore or network drive.
To make a PowerPoint file read-only follow these instructions:
- Having made a copy of your original PowerPoint file open the copy in PowerPoint.
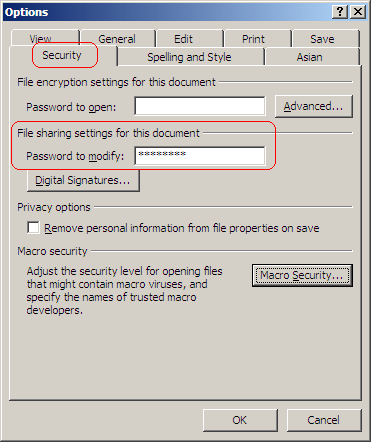
- Access the Tools menu and click on Options.
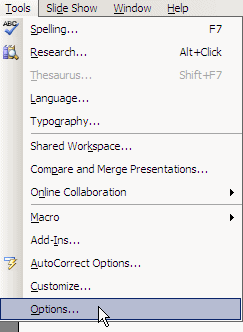
- Select the Security tab and enter the password in the Password to modify box and click on Ok.
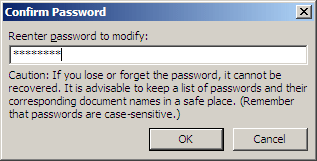
- You will be asked to confirm the password, enter the password again and click on Ok.
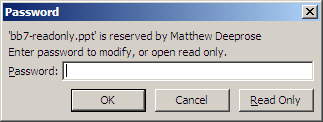
- Save the file and then upload it to Blackboard, make a note in the text box that the file is password protected but that it can be viewed by clicking on Read Only.
- When the file is opened in Blackboard, PowerPoint will ask for a password. By clicking on Read Only it is possible to open the file, view it, and print it out in whichever format is preferred. The same will occur if the file is downloaded from Blackboard and opened separately, users will not be able to edit the file without knowing the password.
