
| Do not open Turnitin in multiple tabs or browser windows. Only use one browser tab to interact with Turnitin. |
This guide explains how to create a custom rubric. A custom rubric allows you to provide feedback to a student based on a number of criteria and scales, awarding pre-determined points for each individual criteria/scale element.
Note that in order to create a new rubric, you will need to have access to at least one Turnitin assignment. This can be on any of your Blackboard courses. Rubrics are attached to your user account rather than to a specific course.
Access Control Panel
1. Browse to a Blackboard course with a Turnitin assignment on it, and then click on Control Panel –> Turnitin Assignments.
Click on assignment name

2. Click on one of the Turnitin assignments listed so that you can see the assignment inbox.
Click on Libraries
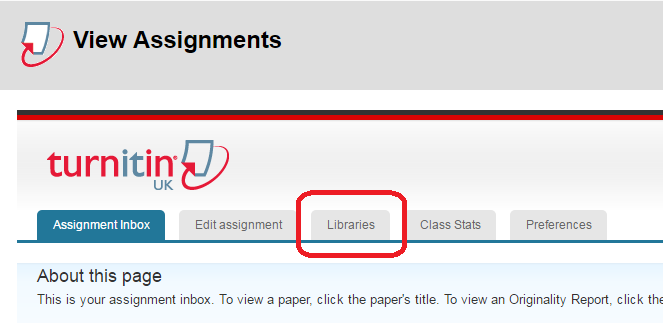
3. Click on ‘Libraries’
Click on ‘Rubric / Form Manager’
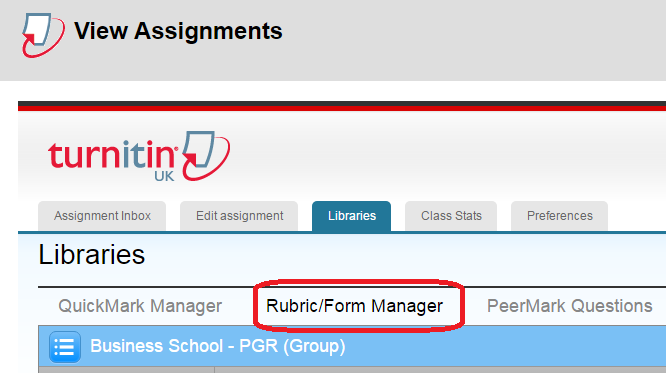
4. Click on the ‘Rubric Form / Manager’ link.
Click on the ‘hamburger’ button
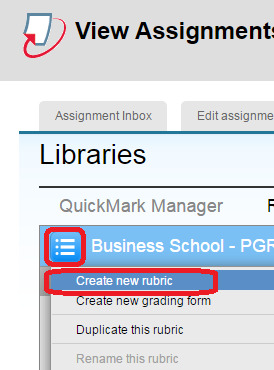
5. Click on the ‘hamburger’ button shown in the screenshot, and then choose ‘Create new rubric’
Select ‘0’ to create a custom rubric

6. Scroll to the bottom of the blank rubric and select the ‘pen and paper’ icon. This setting dictates that you wish to create a custom rubric, where you can award pre-determined scores for each element of the rubric.
Enter rubric name, and ‘save’
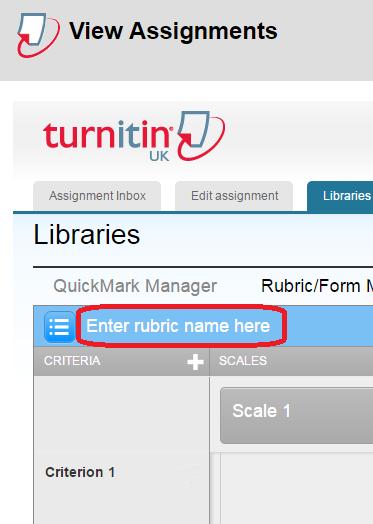
7. Scroll to the top of the rubric and click on the text ‘Enter rubric name here’. This text will change to a text box. Use the text box to enter the name of your rubric. Once you have entered the name of your rubric, scroll to the bottom of the rubric again and click on ‘save’ in the lower right hand corner of your rubric.
Edit criteria
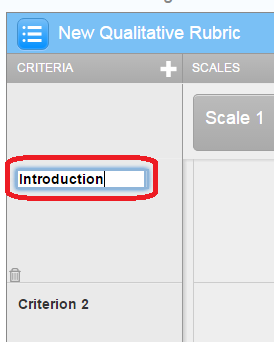
8. Edit your criteria titles by clicking on ‘Criterion 1’ and typing the title for your first criteria. Repeat this until you have all the criteria you require. Note that when adding criteria, the title is limited to 13 characters.
Add or delete criteria
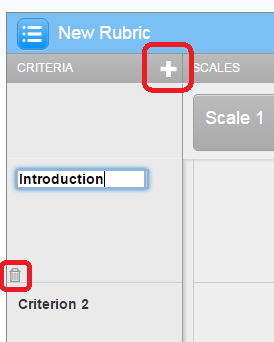
9. Note that you can add new criteria using the ‘+’ icon, and delete criteria using the rubbish bin icon.
Edit scale items
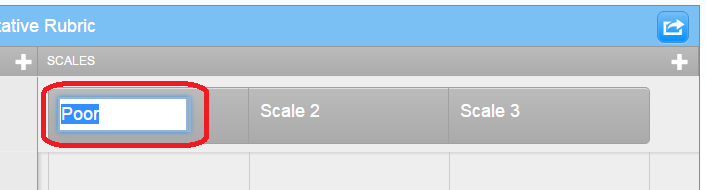
10. Edit your scale titles by clicking on ‘Scale 1’ and typing the title for your first scale item. Repeat this until you have all the scale items you require.
Add or delete scale items

11. Note that you can add additional scale items using the ‘+’ icon, and delete scale items using the rubbish bin icon.
Add descriptors

12. To add a descriptor to your rubric, click in the relevant cell and add the descriptor for the relevant criteria/scale.
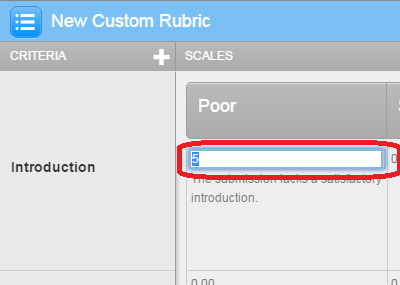
13. Once you have added your descriptor, click on the number above it to dictate how many points you want to award for this element of the rubric.
Save rubric
13. Once you have entered all of your criteria, scale items, descriptors, and scores, scroll to the bottom of the rubric and click on ‘Save’.