Since Summer 2006 the University has licenced third party plug-ins for Blackboard that provide blog,
wiki, and podcast functionality. These have worked well and take up has been reasonable. It was necessary to
licence third party plug-ins for this functionality because it was not provided as part of the core Blackboard
product.
With the recent upgrade to Blackboard the vendor has introduced their own blog and wiki features which
are more embedded into the core application. There are differences between the two but the core functionality
remains reasonably consistent.
The University has determined that it is no longer necessary to licence the third party blog, wiki and
podcast tools and the decision has been made to not renew the licence for these tools in May 2013. This will
provide a substantial cost saving to the University which can be re-invested in further developments to the Managed
Learning Environment.
The new blog and wiki tools are currently being documented and from 31 August 2012 the new blog and wiki
tools will be enabled.
At the same time the existing “Campus Pack” blog, wiki, and podcast tools will be set to be unavailable
to new users.
If you are planning to use blogs, wikis and podcasts, in the new academic year (2012/13) please use the
new Blackboard blogs and wikis, instructions for which will be made available on the iSolutions web site from 31
August.
Podcasts can be uploaded as audio files, or if RSS is required the Panopto Lecture Capture system can
provide this functionality.
Insert Image

1. Edit your chosen wiki page, and position the text cursor where you wish to insert the image.
2. Click on the insert image button.
Image details
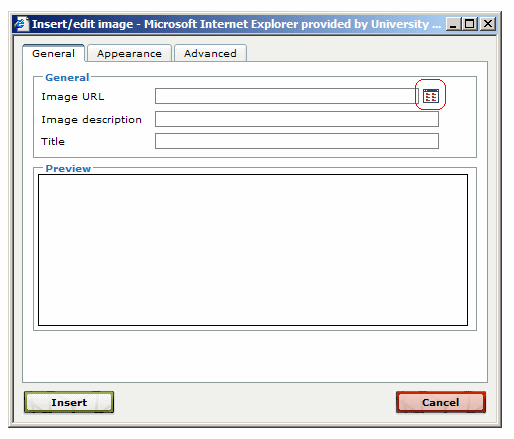
3. You could paste in the URL for an image on another web site, but often you will wish to upload an image from your computer. To do this click on the button indicated in the screenshot above.
Browse for image
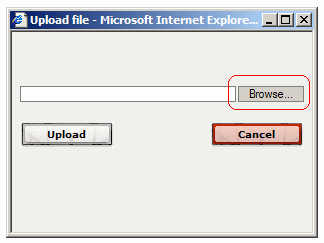
4. Click on the Browse button.
5. Locate and select your image and click on open.
Upload
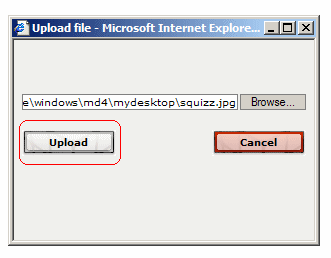
6. Click on Upload.
Insert
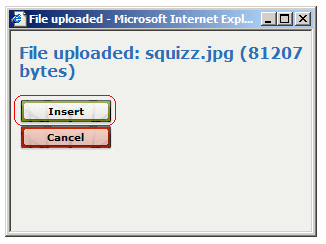
7. Click on Insert.
Extra text?
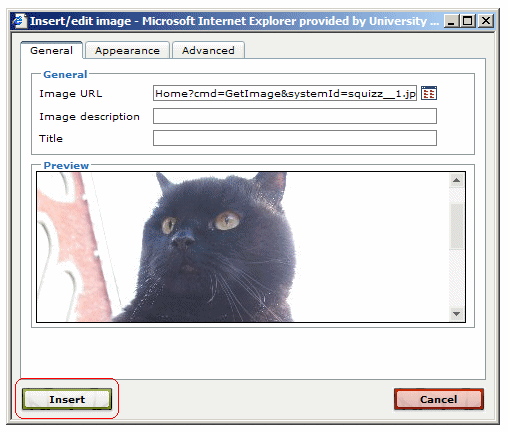
8 You may wish to enter some text into the image description and Title textboxes that describes the image. This will be shown to users who have images turned off or cannot view the image.
9. Click on Insert.
Success!

10. Your image has now been inserted into the wiki page. Remember to click on Save when you have finished editing the page.
