
The Course Files area holds the files that you add to Blackboard. You will only see new files that you add following the upgrade to Blackboard 9 in July 2011.
This guide explains the screen layout and what the buttons and menus can do.
Accessing Course Files
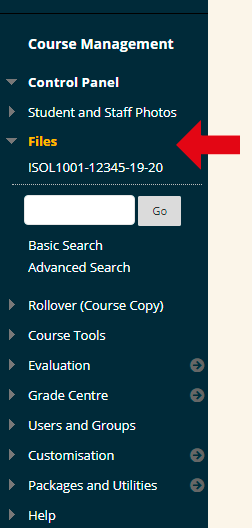
Course Files is accessed by expanding the Files area of the Control Panel and clicking on the course code of your course.
Course Files
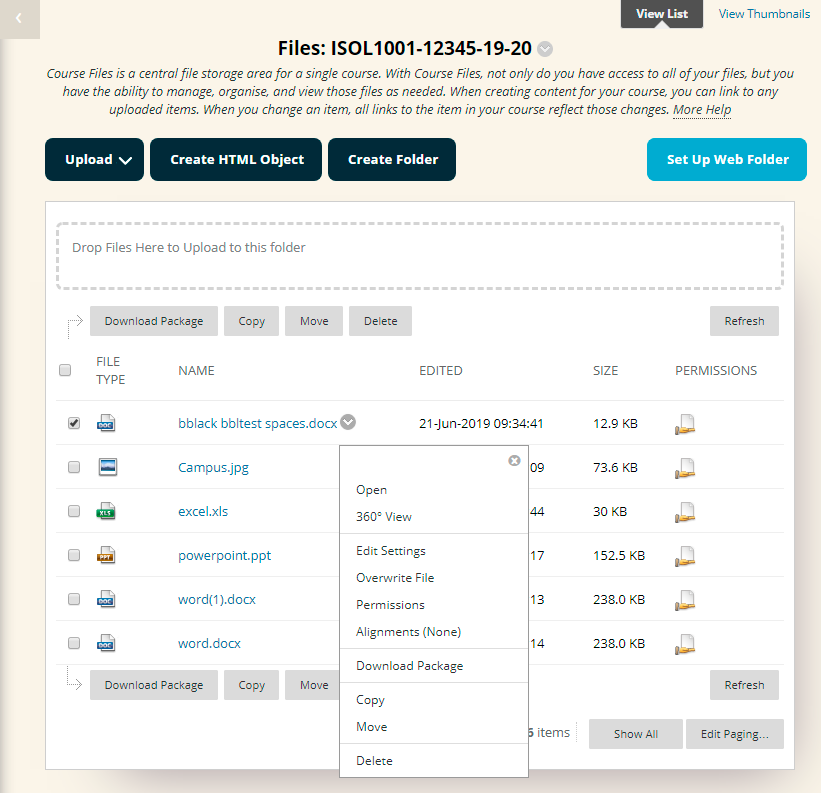
1. This is the Course Files screen. It you can reach it by clicking on the Files link in the Control Panel. The next slides take you through the different buttons and menus in detail.
View

2. At the top right you can choose to view the files in a listed format, or view thumbnails. The thumbnail view can be useful for finding images. You may toggle between the views by clicking on these two links.
Buttons
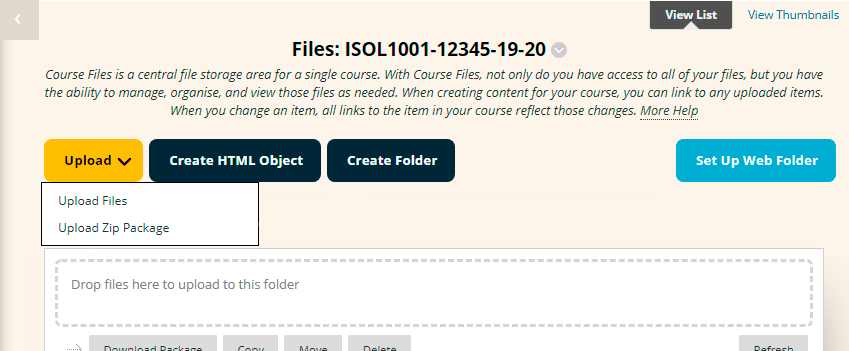
3. The next row of buttons are described below:
Upload Files
This allows you to upload files, either one at a time or in batch.
Upload Package
This allows you to upload a zip file containing multiple files within. Blackboard will then unzip the file contents into the course files area.
Create HTML Object
This allows you to create an HTML object, this feature is not very useful at the moment because such objects can only be used within one course.
Create Folder
This allows you to create a folder within the Course Files area.
Set Up Web Folder
This allows you to create a mapped network drive that goes straight to your course. Once this is set up you may drag and drop files very simply from your computer to your course. Special care should be taken when using this function, especially when deleting files. Web Folders also allow you to edit files directly on Blackboard. Editing files directly via Web Folders should only be done with care and is only recommended for small corrections.
Drop files here to upload to this folder
This allows you to drag and drop files from your computer directly into the current Course File location you are in on Blackboard.
Buttons Too
![]()
4. The buttons on the next row apply to files you have “ticked”.
Download Package
This button allows you to download files from your course. Tick the files you wish to download and click on the download package button. Blackboard will compress the files into a zip file and ask you where you wish to save the zip file. You may then unpackage the file on your computer.
Copy
This button will copy any file you have ticked.
Move
This button will move any file you have ticked. Existing links should still work.
Delete
This button will delete any file you have ticked. This will break any links within your course to the file. This action cannot be undone and so should be used with caution.
Refresh
Clicking this button will ensure that you are looking at the most up to date list of files.
Menu
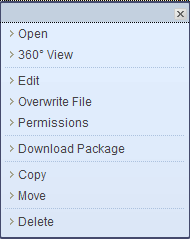
5. This is the menu that pops up when you click on the modify button beside a file or folder.
Open
Clicking this will open the file.
360 View
Gives lots of information about the file including file permissions and links.
Edit
Allows you to change the filename.
Overwrite File
This allows you to overwrite the file. This is useful if you wish to quickly update the file with a new version. If the file is used in multiple places within the same course then overwriting it here will update each version on your course.
Permissions
Allows you to view and set permissions for the file.
Download Package
Clicking this will allow you to download the file compressed within a zip file.
Copy
This link will copy the file.
Move
This link will move the file elsewhere within the course files area. Existing links should still work.
Delete
This link will delete the file. This will break any links within your course to the file. This action cannot be undone and so should be used with caution.