So what exactly is RTI anyway? (Updated)
Remember that bit at the beginning of The Fifth Element, when the professor is trying to read the ancient pictograms and the sleepy boy keeps letting the mirror drop? Turns out what that professor needed was RTI.
I spent a fun day today working alongside volunteer guides at Winchester Cathedral. But we were not giving tours. We were taking pictures of graffiti. But with some of these scratches in stone and wood hundreds of years old, they could be difficult to read. That’s where RTI comes in. James Miles, whose PhD work involves a lot of different ways of recording data about Winchester Cathedral asked for volunteers to help capture data about the graffiti using RTI methodology.
RTI stands for Reflectance Transformation Imaging. It involves a camera, a flashgun, a shiny black or red sphere (snooker or billiard balls are good), and a piece of string. Lets say you wanted to look at graffiti like this:
This is your object. What you are doing to do is light it from a variety of different angles and take a photo of it each time. You’ll want no less that 24 different angles/photos, and the more you have the better the results – until you get to about 80.
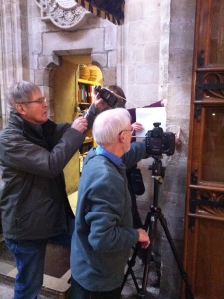
In the end, you’ll import all these photos into a bit of software, which will create a composite image, within which you can virtually “move” the light source around to get the very best angle for which part of the image you are looking at. You can manipulate the image in other ways too, which will (in this case) make the graffiti more readable. But to do all that the software needs to know exactly where you lit the object from in each photo, and that’s where the billiard ball comes in. So first of all, lets mount the billiard ball on a tripod near the object and of course position the camera so that it frames both what you want to photograph and the sphere:
From now on, none of these three can move. The object has of course been there for hundreds of years, but its your responsibility not to knock either tripod (as I knocked the one with the sphere, the first time I tried this). To make it easy on the computer you’ll be using later, the flash has got to be the same distance from the centre of the object in every photo you take. This is where the string comes in. Use a length of string three times the width of the object to measure the distance of the flash from the object each time you reposition it. This way you are creating virtual dome of lights around the object.
At this point you’ll want to take a few experimental snaps to get an optimum combination of flash-power, shutter speed and f-stop. The camera is, of course, in fully manual mode, you don’t want it changing things after you’ve set it up.
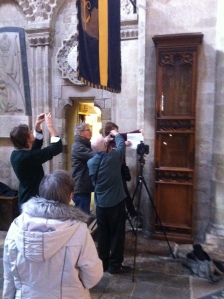
Happy with your set up you’ll start taking photos. But you don’t want to touch the camera, so it’s best you use one of those remote control doo-dads that triggers both flash and camera. Our team included one to hold the flash one to hold the other end of the string, these two also have to concentrate on avoiding camera, ball and tripods, so we had a third volunteer to trigger the camera from a safe distance (when the string is safely out of the way), and in this case a fourth to hold a white piece of paper behind the ball, which would otherwise be lost in shadow:
Each time you shoot, move the flash methodically around the object. Most of us decided this meant starting at the top, and moving the flash down a few degrees each time, then starting another vertical column a few degrees round to the right. We had to take care not to light the object from any position where ball, camera or tripod would cast a shadow on the object. And remember, move either ball or camera, and you have to start again…
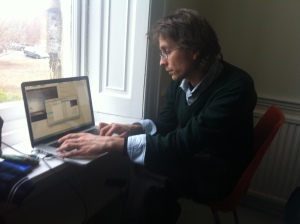
Next its back to the computer. Here’s trainer, Hembo, showing us how to process the data:

This is where the billiard ball comes in. The first stage of creating the image is to show the computer where to look for the ball. The software identifies the ball in each picture, and pinpoints where on the ball’s surface the flash is reflected. Then for each pixel in that picture (and here I might be oversimplifying what was explained) the software “deletes” any light that isn’t coming from exactly the same direction. Then, with some clever maths, it puts all the data left from all the pictures together in a file that you can manipulate in another bit of software (the viewer). Here’s that being demonstrated:
So, that’s what RTI is.
Some of the manipulated images from the graffiti that we recorded will be online soon. And when they are, I’ll post a link. UPDATE: here’s the link, scroll down and click on the pictures: they’ll reveal the enhanced version. I was involved in Hembo’s group.


