We are Saturday Club and we are artists

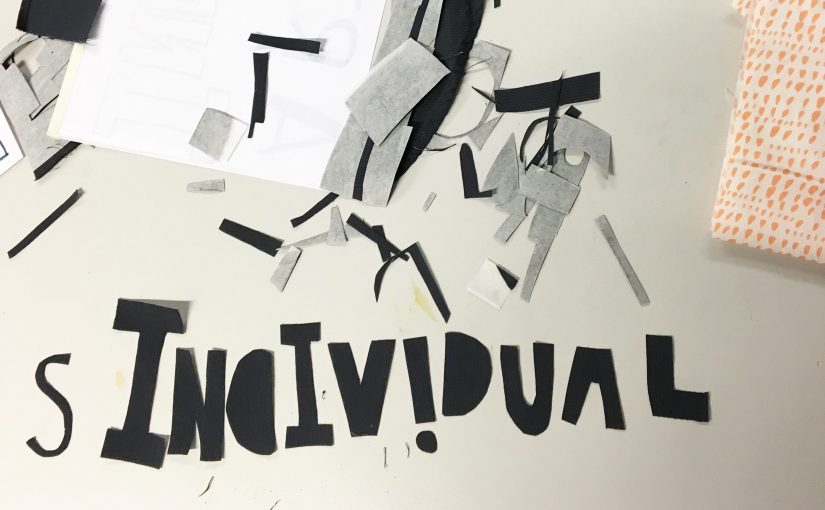
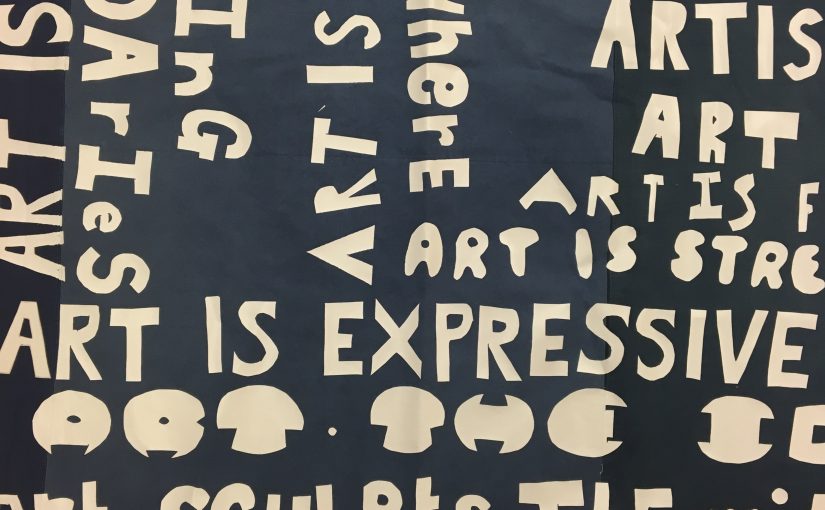
This week we were in production mode; developing our slogans about what we believe art is into a giant collaborative banner.

Using a limited colour palette of white text on a dark blue canvas *  to unify the individual slogans we arranged everyone’s contribution. The whole process was very democratic with each decision about aesthetics and design being held to a vote.

The hand cut vinyl letters were bonded on to the canvas and create a really sharp professional look almost similar to screen printing.

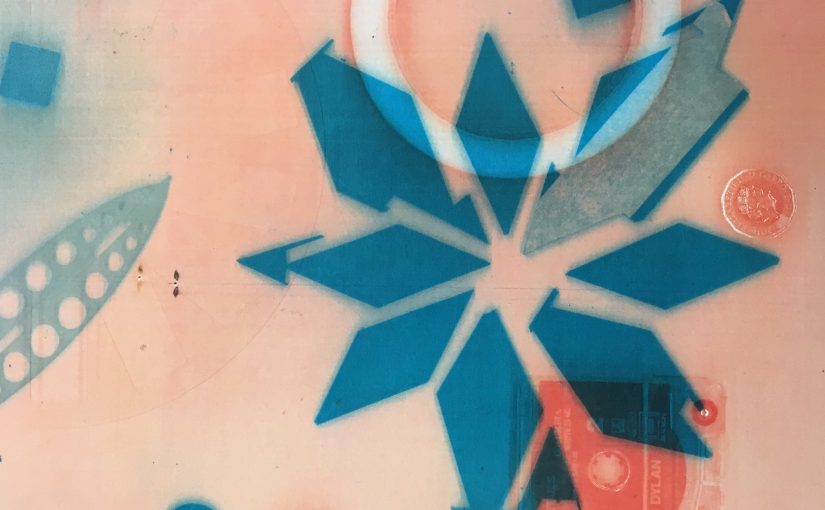
To sit along side our banner we each made a t shirt with the slogan ‘artist’ to be worn to the private view. The t shirts also allowed us to try out a third method of getting text or images on to a textile background. We created stencils using ‘freezer paper’ and sponges to apply fabric paints; this simple technique created really striking results. Of course some of the artists rebelled with ideas of their own about their t shirt designs; which seemed totally fitting after all our discussion around art allowing you to find your own voice!

The manifesto will get be sent straight away to London for the exhibition; we cannot wait to see it at Somerset House as part of the National Saturday Club Summer Show!

*Made from dyed and patched reclaimed fabrics, inspired by our session with Linda Mackie which focused on textile waste.

Some of the club members had plans to use this printing technique on other projects so for their reference here are the materials we used:

Fabric paints        https://www.bakerross.co.uk/search/go?w=fabric%20paints

Sponges                https://www.bakerross.co.uk/search/go?w=paint%20sponges

Freezer paper sheets    https://www.amazon.co.uk/Silkcraft-Freezer-Paper-Sheets-A4/dp/B00DS4Q2C0

These are not sponsored links.

Art is……..

We are Winchester School of Art Saturday Club and we believe art is…

As a round up to the year we decided to create a manifesto that will be exhibited as part of the National Saturday Club Summer Show.

We started by looking at the graphics and methods used in political art or protest to voice ideas. We then looked at artist manifestos and artists commenting on challenging social situations and how this might instigate change.

Reflecting on our experiences over the year in Saturday Club we created a long list of materials and processes we have used to make art. We also added verbs as to how you might make art. We then thought about our ideas about what art is and how these might have been strengthened, broadened or even changed by taking part in Saturday Club.

Each member chose one statement to put forward to be added to the Saturday Club manifesto. We are going to create this collaborative final art work next week but this week we created our own smaller test banners.

Everyone developed their own ideas using reclaimed fabrics and a textile bonding technique called bondaweb. Each panel was totally unique, reflecting the individuals ideas in text but also through colour and pattern choices, font and layout. The outcomes were really fantastic and I was quite disappointed that they were only tests. I hope the final manifesto looks half as good!

To see some of the artists referenced for this workshop check out:

https://www.pinterest.co.uk/vanessarolf/protest/

There is a really great exhibition connected to the ideas in this workshop called Hope to Nope: Graphics and Politics on show at the Design Museum until 12th August

http://designmuseum.org/exhibitions/hope-to-nope-graphics-and-politics-2008-18

Fashion Revolution

This week we were exploring sustainable fashion and how we might affect change  with Linda Mackie, Senior Teaching Fellow on Fashion Marketing and Management along with two student ambassadors Ashwinnie and Yijing.

Linda began by showing us some successful campaigns and talked about how designers, artists, photographers and stylists all work together to develop a brands message.  She introduced us to Fashion Revolution Week, a campaign to improve working conditions of those in the fashion industry after a tragic disaster killed many workers in a factory in Bangladesh in 2013.  In response to Fashion Revolution’s call to reduce cheap, fast fashion and respect the human and environmental resources it takes to produce clothing, our brief was to create a new advertising campaign for the charity Oxfam. The local store had kindly given us a heap of donated items they had not been able to sell despite all being in excellent condition and some even big name labels.

The brief: Oxfam is a leading charity in second hand clothes and great advocators of sustainable living.  Consumers are more and more in tune with the issues of sustainability and Oxfam could really potentialise this opportunity in sales if they develop a clear message to their consumers. But who are their consumers? How could they drive more business, and how could art, design, photography, graphics or fashion designers use their skills to work towards a more sustainable future and raise awareness.

The group were given a bundle of clothes and asked to explore how they might style them to work alongside a message to encourage consumers to rethink their attitude to buying second hand clothes.

Each group approached the task differently, some thinking through their ideas and getting their campaign message clear before they began exploring their garments and others getting excited about the styling possibilities straight away.  The groups elected models, photographers and art directors and we headed out onto the WSA campus to hunt for shoot locations. This was a lot of fun!

Back in the studio each group used photoshop to work into the photographs, incorporating their campaign message and the Oxfam logo. The ideas were really strong, several groups played with incorporating the hash tag into their text to encourage others to respond and share their interpretation. Some focused on waste such as  ‘Keep it’ and ‘New? No, landfill’, others focusing on the fun you can have with fashion ‘Be different’ and ‘Keep it colourful’.  At the end of session the outcomes were shared and Linda selected several strong candidates to take back to Oxfam Winchester to see if they would like to display them in store. We hope they do!

www.oxfam.org.uk

www.fashionrevolution.org

The mighty Riso

Katie had ambitious plans for us during this session!

One group began by selecting from last weeks’ artworks to create a showcase of the processes and ideas they had explored. Each member had their own individual  publication that documented their outcomes from the previous week. As a group they worked together to design a collaborative cover which was then printed on the Risograph using coloured paper and the ‘Riso’ trademark fluro inks. Georgia de Buriatte (Saturday Club assistant and BA Printmaking 3rd year student) shared her bookbinding skills with the group, showing us how to fold and saddle stitch the pages so we all had our own finished book.

The other half of the group became an editorial team; selecting images and developing text about the Saturday Club projects this year, which will become a publication for us to keep and share. Katie talked about working with Studio 3015 at Winchester School of Art and the process of designing in a team to create books, magazines, posters, prospectus and all kinds of printed matter. She showed us some examples of the projects she has worked on and how different printing methods, binding and paper choices all affect the visual message of the content. The publication team annotated and edited text about each workshop session and chose from the stock of photographs taken each week to showcase both the outcomes as well as the materials and methods used.

Half way through the morning we swapped around so everyone got a chance to use the mighty Risograph, make their own book and have their input into the publication.

The WSA Saturday Club year book will also be printed on the Risograph, when it is finished we will share on the blog so keep your eyes peeled…

Here is bit more about the Risograph:

“The Risograph is an environmentally friendly and cost effective printer, which uses soy-based inks to produce unique outcomes. Each stencil (master) is made from thermal sensitive paper and unlike offset printing it only takes a single print for the screen to be fully inked and ready to print thousands of copies. The Risograph is extremely energy efficient and generates a minimal amount of waste.” – Hato Press

layer, edit, scan, copy…repeat

Graphic Designer Katie Evans (WSA graduate, current MA student and designer with WSA 3015 studio) led us in a session exploring techniques linked to Risograph printing. We used processes which mimicked the Risograph, getting to grips with the concepts of how you might create an edition or publication.

Using scanners, in built mac cameras, the photocopier (a pretty fancy one) and straight forward cutting and sticking we physically recreated the Risograph process to understand its pro’s and cons.

A set of found objects were given as a starting point and members were divided up into groups and worked their way around ‘stations’ in the room; each had a different set of equipment and a series of action words as prompts.

The groups then had free reign to respond in any way they chose; which ranged from creating 3D sculptures combining cutlery and fruit, to layering their own portraits over photocopied cassette tapes, perspex remnants from the laser cutter and stencilled shapes cut and repeated to form abstract patterns.

The outcomes were so varied and showed us how often having constraints can stop you worrying about outcomes and allow you to focus on exploring the possibilities in the process. Some of the layered single coloured photocopied objects were really very beautiful.

Take a look at our next post when we actually got to use the Risograph itself!

Clay!

Today’s session was all about exploring the possibilities of clay. With very little guidance the group began to play about with a lump of clay. Instinctively members began to build, extend, grow, impress, indent, impress, loop, mold, press, pummel, pinch, pull, poke, roll, stretch, stack, stroke, score, scrape, thump, topple and smooth the clay as soon as it was put down in front of them.

To begin with we worked with no tools except our hands, later introducing found tools from the kitchen drawer. We also thought about how we might create small units: coils, containers, cones, cylinders, donuts, letters, leaves, pebbles, strips, sticks, squares, spheres and anything else the group could conjure up. We explored the clay’s material properties with no notion of what we might make.

Mid-way through the morning we looked at some images of how clay is used in our every day lives, from tea cups, to toilets, sewer pipes and bricks. We also looked at artists who push the material possibilities of clay, thinking not just about making representation objects but how what we make can reflect both the material and the physical processes of making.

We worked focusing on the tactile exploration, thinking more about the experience than outcomes and enjoying the process. We created some fantastic experiments and we wait to see if they survived the kiln, as they are going to be fired over the Easter break.

Take a look at the pinterest page for more inspiration

https://www.pinterest.co.uk/vanessarolf/playing-with-clay/

The brilliant ceramicist Nao Matsunaga will be exhibiting at the Crafts Study Centre in Farnham from 3rd April 2018 – do go and see the show if you can.

http://www.csc.uca.ac.uk/new-events/2018/4/3/70pv9umzst87dqqm9f0v5fim8j65u5

Masterclass with Gerhard Richter

We were delighted to host our National Saturday Club masterclass led by Asten Holmes Elliot from the John Hansard Gallery in Southampton. The morning explored the processes and thinking of artist Gerhard Richter.

The session began with an introduction to Richter, one of the 20th and 21st century’s most significant artists, focusing on his methods of layering paint over found photographs to distort, conceal and reveal elements within the original image. The group really engaged with this presentation, as most knew nothing about his work and enjoyed thinking about the possibilities of how a painter might explore a technique to express ideas as well as the obvious visual image.

Asten then gave us a mountain of found images to work with. We were given free reign to use the paint in any way we wished to alter the image. Taking Richter’s lead one club member devised a ‘squeegy’ from a magazine folded in two and used it to drag paint across the picture. Other members worked as a team to devise a collaged narrative, thinking about their intervention as a way of altering the meaning of the original image.

By the end of the morning we had created a whole gallery wall. Students discussed the work they felt was most successful and used this as the basis of their written response to the whole experience, enabling them to complete the first stage of their Arts Award.

A huge thank you to Asten and the John Hansard Gallery for this amazing masterclass.

There will be an exhibition of the work of Gerhard Richter at the John Hansard Gallery from 12th May 2018. We cannot wait!

http://www.jhg.art/event-detail/292-artist-rooms-gerhard-richter/


Game play

This was our second session with Chris and Sam from Games Design and Art . Developing on from last week’s assembled characters, which combined humans, monsters, animals, sea creatures and fantastical beasts, we explored the kinds of worlds they might live in and how they might use their special powers for good or evil.

Chris introduced numerous game styles: puzzle, adventure, combat, shoot ’em up, simulation, strategy and role play. These styles were assigned to the group, who discussed their characters, how they might interact and what narratives their game might contain to hook in the player.

The members got so involved in their game development and created thoroughly plausible outcomes; from a rat being chased around a kitchen by a crazy chef, to an intergalactic war centred around a space diner, to escaping from a scientific laboratory.

Everyone’s ideas were pitched back to the group at the end of the session. There was so much thought put into these proposals – don’t be surprised if some end up as fully fledges games in the future.


Character design

This session we met Chris O’Connor, technician working with both Games Design and Art and Graphic Arts. The workshop was supported by third year Games Design and Art student Sam.

These workshops were focusing on Games Design and Art; at WSA this might include developing narratives, character and environment as well as coding, for computer, board or card games. One example of how broadly the definition of  ‘games’ are taken was WSA students working on a brief to create a mini golf computer game, which they then translated into a physical game, including the windmills!

We got started with a version of ‘exquisite corpse’ where everyone drew at least two heads, torsos, and sets of arms and legs – there were no restrictions so we had humans, monsters, animals, sea creatures, fantastical beasts and the rest


These were then cut out and swapped around so everyone could create their own ‘Frankenstein’ style character. The drawing skills in the group were fantastic, showing how well they could draw forms from memory although there were resources to reference if needed. Mixing up the body parts stopped anyone from sticking to preconceived ideas around what a games character ‘should’ look like.

These assembled characters were then given names, personality traits, skills and a back story. The group got really into this and needed no encouragement in developing wild narratives around their creations.

Adam Procter, Programme Leader – BA (Hons) Games Design & Art also visited us during the session to speak with the group about the course and took us to trial some games developed by first year students. It was great to see ‘work in progress’ to get an idea of what kinds of computer games were being designed and how they tested out basic prototype ideas to get player feedback. The WSA students had also included their inspiration and ideas of how graphics could be developed. The Saturday Club members enjoyed seeing these games in their raw state, getting an insight in to how the slick finished product we experience as games players starts out.

Check out the free coding software to start developing your own games Chris mentioned here: https://unity3d.com/

Thinking in 2D, 3D and back again

Back from the festive break and ready to get making! We kicked off the year drawing and thinking of how 2D and 3D looking and thinking are related.

Using common household objects as our starting point we began with some drawing warms up to get us back in the swing. Working on long lengths of paper for 1 minute with charcoal, we moved around the room, drawing around or over the previous person’s drawings. The paper began filling up as we drew by touch and from someone else’s description.

Now that we were really familiar with the objects we moved from representing them in 2D to 3D, drawing directly with lengths of wire. The wire forced us to relinquish some control, as it is harder to manipulate and encouraged us to think about the line coming off the page and becoming sculptural.

This then developed to working in cardboard. The group’s representations of brushes, cups and tea pots working roughly in cardboard were ingenuous and showed a real understanding of 3D thinking. Their knowledge of how to create basic 3D shapes from a flat material allowed them to be really ambitious, often taking a very individual approach to creating responses to the same objects.

Their wire and cardboard objects were then installed alongside the originals and we drew both ‘real’ and sculptural version of the real objects again, this time using ink. The ink drawings showed confidence of line and how the activities had developed the members’ observational skills.

By the end of the session the room was filled with fantastic drawings and sculptures.