The human knitting machine

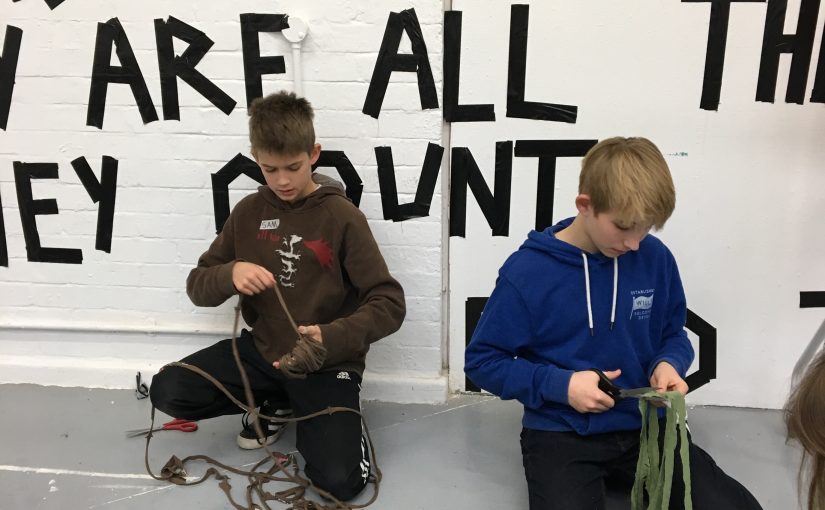
This week we continued exploring yarn and knitting with knitwear designer and WSA tutor Antonia Sullivan.

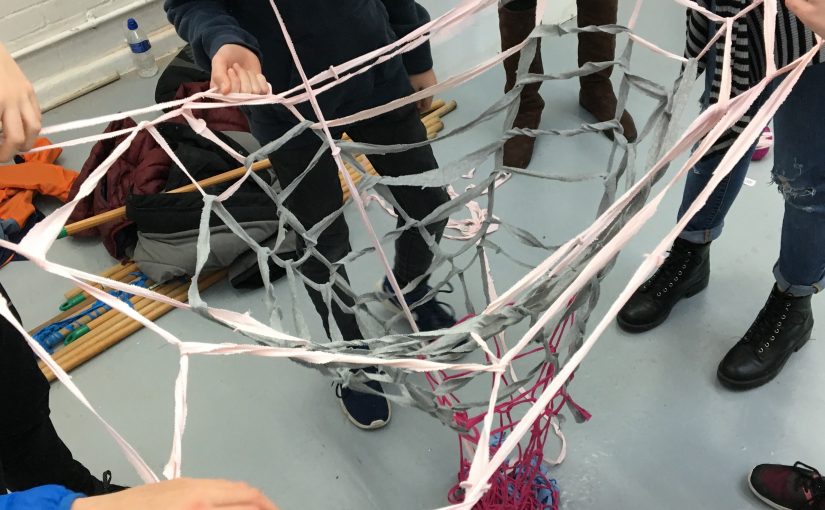
We began by creating yarn using t shirts, we had all perfected this technique having practiced last week. Once we had an enormous mountain of yarn we got into groups and became a human knitting machine. Based on the principle of ā€˜French knittingā€™, usually using a cone with a central hole and a series of pegs to loop the yarn around, this time the pegs were replaced with people creating a giant web of yarn, which grew really fast once we had all worked out how it worked. We then displayed our finished lengths around the room creating a network of threads.

Moving from the collaborative to the individual, from the macro to the micro we scaled down and tried ā€˜hand knittingā€™ and ā€˜finger knittingā€™. These processes using no needles created fun quick results, particularly with the jumbo t-shirt yarn. We then battled with giant broom handle needles but the results were slower than the earlier techniques.

These were then added to the growing ā€˜installationā€™ in the room. Seeing the knitting in this way allowed you to understand the structure of the process and where different knitters had different ‘tension’ creating tighter or looser patterns.

It was a really hands on, playful, physical end to this terms’ series of workshops and we all felt proud of having mastered a new skill.

The possibilities in a length of yarn

Todayā€™s workshop was led by Antonia Sullivan, tutor on BA Textile Design specialising in knit. She introduced us to the variety of ways that knitting can be used as a basic binary process. Depending on the type of yarn and the scale it has an amazing number of applications: from clothing to heart surgery. There were examples of giant flags knitted by cranes, knitted computer coding and miniature clothing smaller than a fingernail.

We made yarn out of old t-shirts by cutting them into strips to create a continuous length. We then knitted this on giant needles. Only a couple of the group had knitted before but we got the hang of this really quickly and the thick yarn meant we made speedy progress.

During our break we took a tour around the BA and MA Fine Art interim show. Georgia, Saturday Club assistant, had a sound work in the exhibition so it was great for us to get a better idea of her practice. It was an interesting contrast to our visit to the Courtauld Gallery to see the variety of media and subjects explored by the students studying at WSA.

Once we had got to grips with hand knitting we moved on to making pom-poms. We turned chairs upside down to use the legs to wind the yarn. We chose as many different colours and textures of yarns as we wanted and used as much yarn as we could wind and then tied it into sections. Then we cut the windings, which magically transformed into pom-poms.

The morning was a playful but productive introduction to the possibilities using just a length of yarn.

For inspiration and resources take a look at the pinterest page Antonia has set up:Ā  https://www.pinterest.co.uk/sprig_knitwear/knitting-saturday-club/

London visit

On the 18th of November the Winchester School of Art Saturday Club took the coach to London to join with other clubs from across the country for an exhibition of everyoneā€™s self portraits. We were all wowed by the Central St Martinā€™s College of Art and Design building, which hosted the day.

Our 3D portraits looked great and got lots of positive comments. We loved seeing how varied everyoneā€™s response to the same brief had been; there were paper cut outs, woven, collaged and cardboard self portraits to name a few. In teams we made transparent buildings from tracing paper, which we added to a growing city installed in ā€˜the streetā€™ at CSM. We also had an inspirational talk from a designer at Lego reminding us of the importance of nurturing creativity and exploring every opportunity given to us to further our skills.

We then headed off to the Courtauld Gallery where we were given a tour of some of the most famous paintings in their collection. We talked and drew with a curator at the gallery who encouraged us to explore the line of a Renaissance biblical figure and think about the backstory to an Impressionist bar scene. We could have stayed exploring the gallery for a lot longer. There was just time for a photo opportunity with the Christmas tree in front of the ice rink at Somerset House before we jumped back on the coach and headed for home.

It was a great day and everyone felt really proud of their achievements so far and excited about the projects still to come.

Process led printing

This morning was all about print with Andy Reaney, Printmaking technician.Ā Andy gave us a short introduction to the ideas around process led or rule bound making and showed the group artworks created by instructions set out by artist Sol le Witt as a starting point.

One wall of the room had laser cut offcuts in a range of different shapes, patterns and sizes. These random found ā€˜platesā€™ would be all we would be printing with for the session. We then got straight into the ā€˜gamesā€™ that Andy had set up to further constrain our decision making and get us to focus on the process as much as the outcome.

We threw dice to select the shapes we would use to relief print from, again to decide the colour ink we would use and again to locate where on the paper the plate would be positioned. Each member of the group took it in turns to print on the same piece of paper creating random layered shapes and colours which created some really playful effects.

The second ā€˜gameā€™ involved the first person simply choosing which corner of the piece of paper to print their ā€˜plateā€™ and the rest of the group following their lead and over printing in the same place. The group worked away creating a whole wall full of collaborative prints.

The second half of the session members could use any plate, colour and composition they wished and everyone made a one off print. Having been introduced to the materials that we had to work with and the basic relief printing process there was no stopping us now that the constraints had been lifted. Some people chose to continue the abstract pattern making theme whilst others chose a more narrative approach, using the pre cut plastic shapes to make an image that told a story.

It was a really productive morning andĀ everyone should be very proud of the fantastic work they created in just 3 hours. It was a brilliant introduction to printmaking but also to how limiting decisions can be a very creative process.

From digital back to analogue

Our tutor Chris had taken the 3D digital models created in ā€˜z brushā€™ last week and turned them back into an analogue paper version. The groupā€™s faces were printed onto dissected shapes to be cut and stuck together. The morning was spent in very focused cutting, folding and gluing. We learnt the different between a valley fold (concave) and a mountain fold (convex) as well as how sticky UHU glue is!

Whilst everyone worked away creating their 3D portraits each member showed the rest of the group a piece of work they had made either at home or at school. We talked about their inspirations as well as the materials and processes they liked to use. This was a fantastic insight into the incredible level of existing knowledge and skill within the group. I hope everyone enjoyed sharing their work as much as we enjoyed seeing it.

By the end of the session we had these brilliant 3D portraits. These will be sent off to London in advance of our visit to Central St Martins College of Art and Design in a couple of weeks where they will be exhibited alongside portraits of the other National Saturday Club members from across the country.

3D images vs collage zines

We got started straight away this week on taking our digital self portraits from last week into ā€˜z brushā€™ a 3D modelling programme. Chris Carter, sculpture technician, led club members through the process using a generic face, which they ā€˜wrappedā€™ their own images on to. These will be developed into an ā€˜analogueā€™ 3D model next session.

In contrast to the digital portraits the other half of the session explored basic collage techniques using found imagery and text from magazines and newspapers. Georgia De Buriatte, third year Fine Art student and Saturday Club assistant, showed us examples of her books and zines where she uses simple collage techniques, letter press, risograph printing and photocopying to develop imagery and ideas. We discussed the role of zines to create networks of people with common interests in the pre internet days and how artists often use this cheap and easily reproducible format as a way of getting their work out to a wider audience. Georgia showed us a range of different artistsā€™ zines and bookbinding methods and then demonstrated a simple fold and cut technique which we used to create our own format to work on. Using the materials given we developed ground papers and created text and imagery; exploring the theme of portrait in a very loose, playful way.

Everyone got cutting and sticking; the finished zines were graphic and direct, exploring the possibilities for a process that could be extended further in all kinds of directions. The group embraced this approach of letting the materials and the methods lead the outcomes, rather than planning what to make at the outset. Reflecting on unexpected results and intuitive ways of working that show what you are naturally drawn to and how you like to make.