
A course blog can be accessed by all users. Entries may be added by all users. Comments if enabled can be added by all users. A Course Blog will show posts one below the other by all users within the month or week.
Course Tools
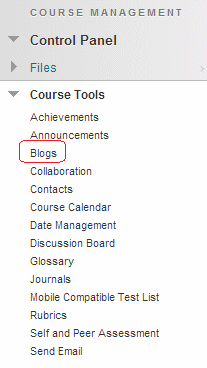
1. From your course’s Control Panel expand the Course Tools menu and click on Blogs.
Create Blog
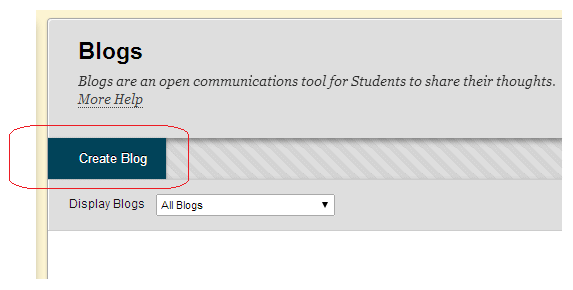
2. Any existing blogs will be shown here. Click on Create Blog.
Name and Instructions
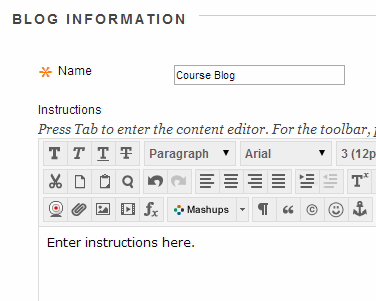
3. Enter a Name and any instructions. For instructions you may wish to inform your students that all instructors and students may view and add entries to the blog.
Available?
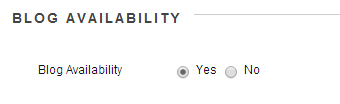
4. For students to be able to access the blog, Blog Availability must be set to Yes.
Date and time restrictions?
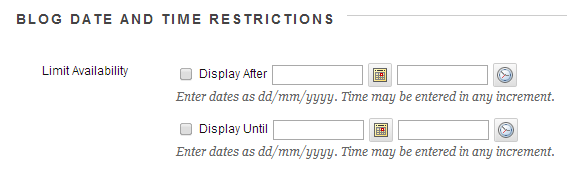
5. If you wish you may place date and time limitations on when this blog will be available to students.
Blog Type
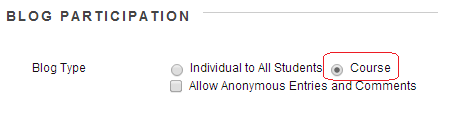
6. Set the Blog Type to Course. You may choose to allow anonymous entries and comments if you wish. iSolutions cannot identify who made anonymous entries or comments. Therefore only enable this option if you are certain you will never want to identify the person who made an anonymous comment or entry.
Settings

7. Set the blog settings according to your preference:
Index Entries: Choose for entries to be indexed in a monthly or weekly format.
Allow Users to…: Choose whether you wish users to be able to edit and delete their entries and / or comments
Grade Centre?
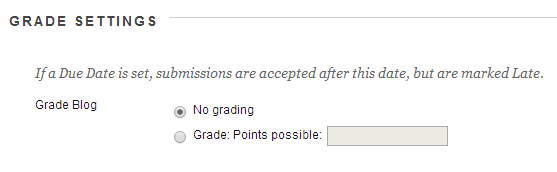
7. If you wish to add a Grade Centre column for the blog choose to Grade Blog and set the maximum number of points possible to score for the work on the blog.
8. Click on Submit to finish.
9. Your course blog has been created. Make sure that you have added a link to the blog in your course menu so that students may find it.